MobileMonkey 101: Converting Facebook Conversations into Emails (Part 1)

Have feedback on this article? Email product@mobilemonkey.com
This two-part guide will walk through the steps of how to make your MobileMonkey Chatbot respond to users who click the Send Message button on your Facebook Page and ask them some important questions.
In Part 1, we'll configure our Facebook Page Welcomer and Notification widget.
In Part 2, we'll edit our dialogue to segment our audience.
Let's dive in!
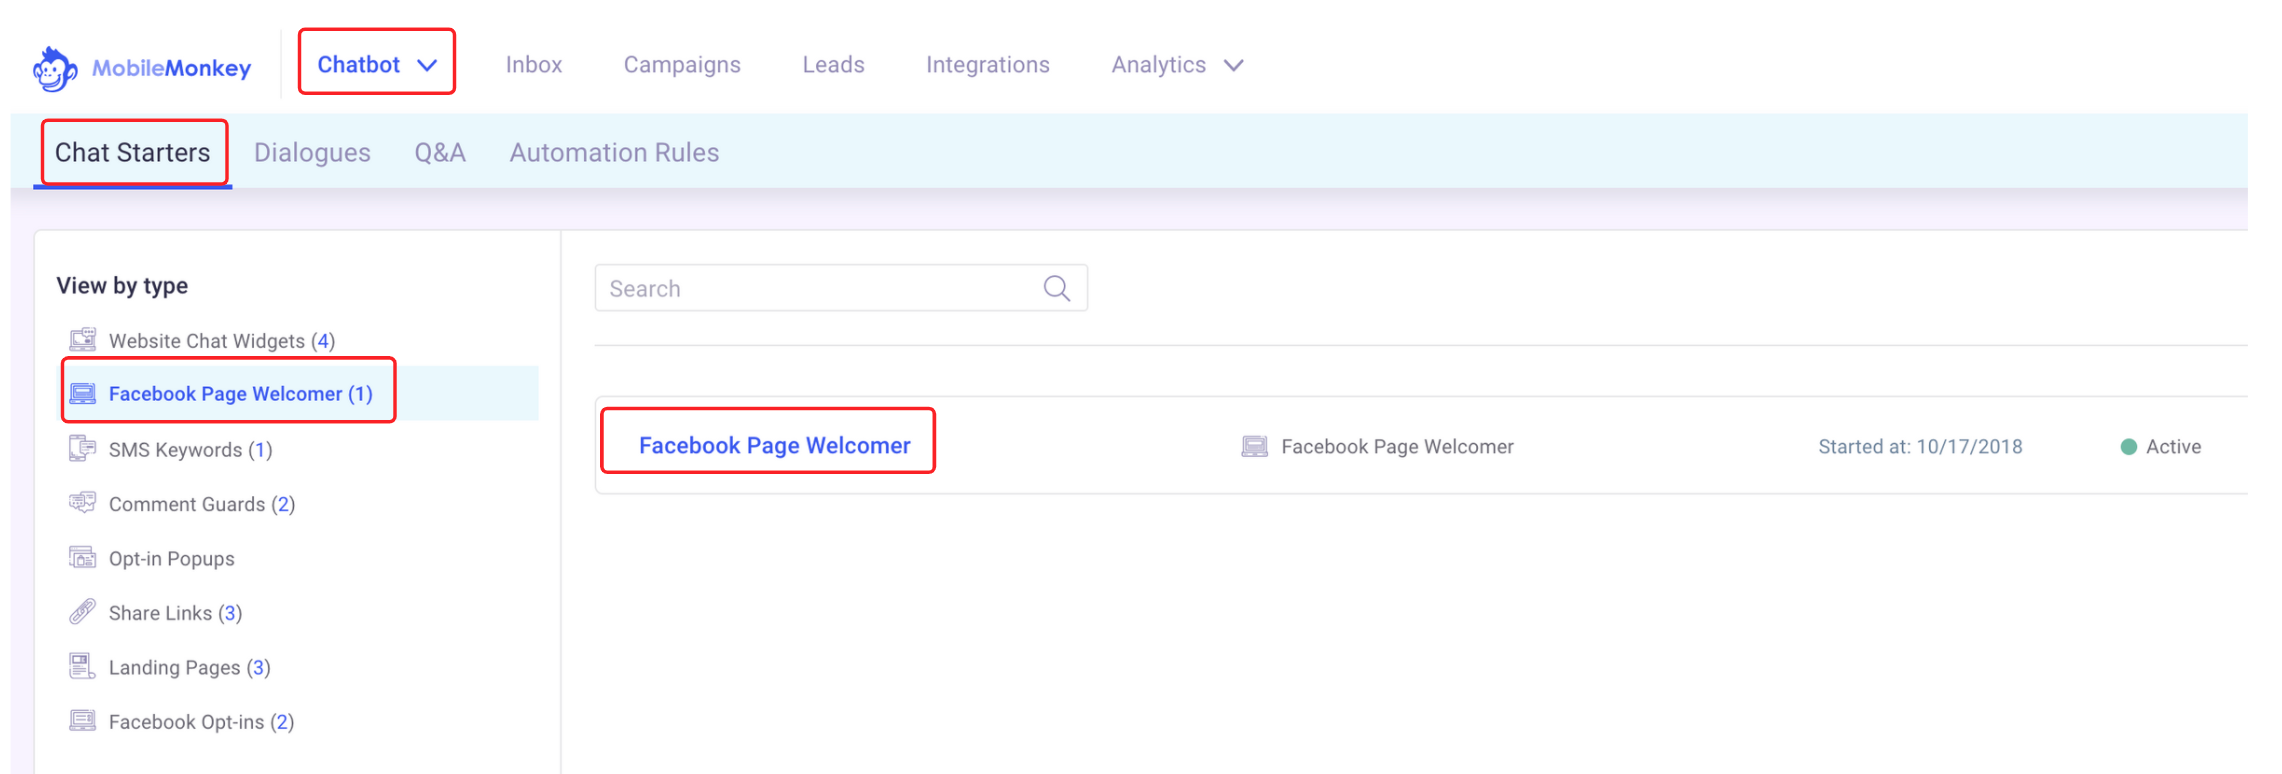
Step 1: Start editing your Facebook Page Welcomer
In MobileMonkey, click:
- Chatbot
- Chat Starters
- Facebook Page Welcomer
Then click on Facebook Page Welcomer on the right.
Step 2: Decide what your first message is going to be. You can choose from the following options:
- Text Widget
- Quick Question Widget
- Image Widget
- Notification Widget
- Gif Widget
- Form Widget
- Gallery Widget
- Attachment Widget
- Navigate Widget
- Video Widget
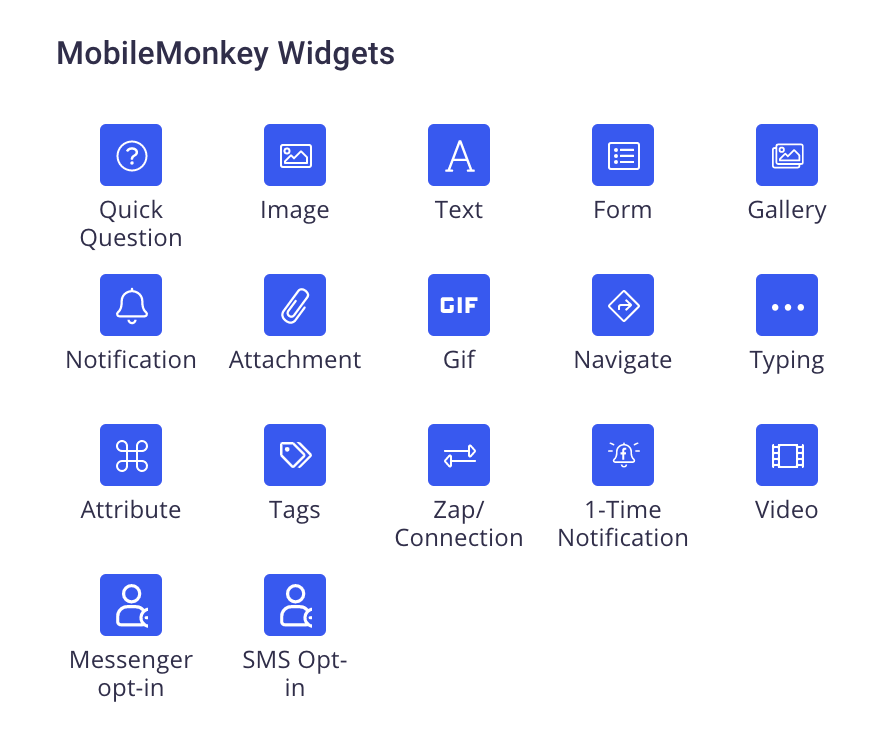
We recommend you start with a welcome message. The best way to do this is by adding the Text widget.
Add a Text Widget
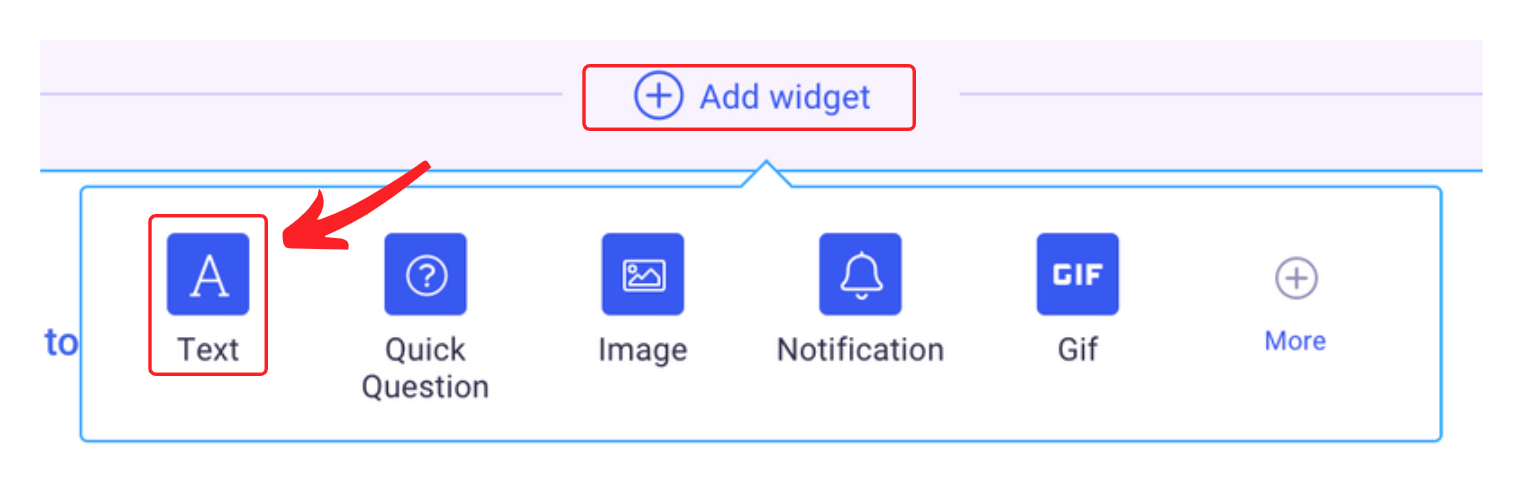
Once you click on the Text icon you will see the widget below. Simply type a welcome message that you want your visitors to see.

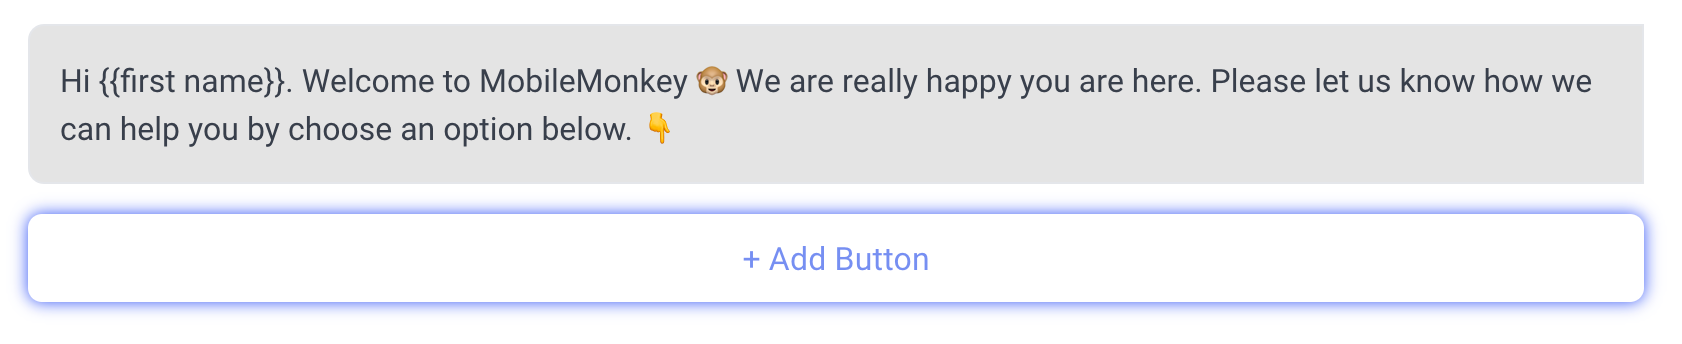
Here is an example welcome message. You can place emoji's inside your message to give it personalization. You will notice that there is a button below the text. It is not required to add a button and if you don't you will just see the text message which is what we recommend for this first message.
We like to give our new visitors some different options as to how they can interact with us. There are a couple of ways to accomplish this. You can use a Quick Question widget or if you want to get a little more fancy you can use a Gallery widget.
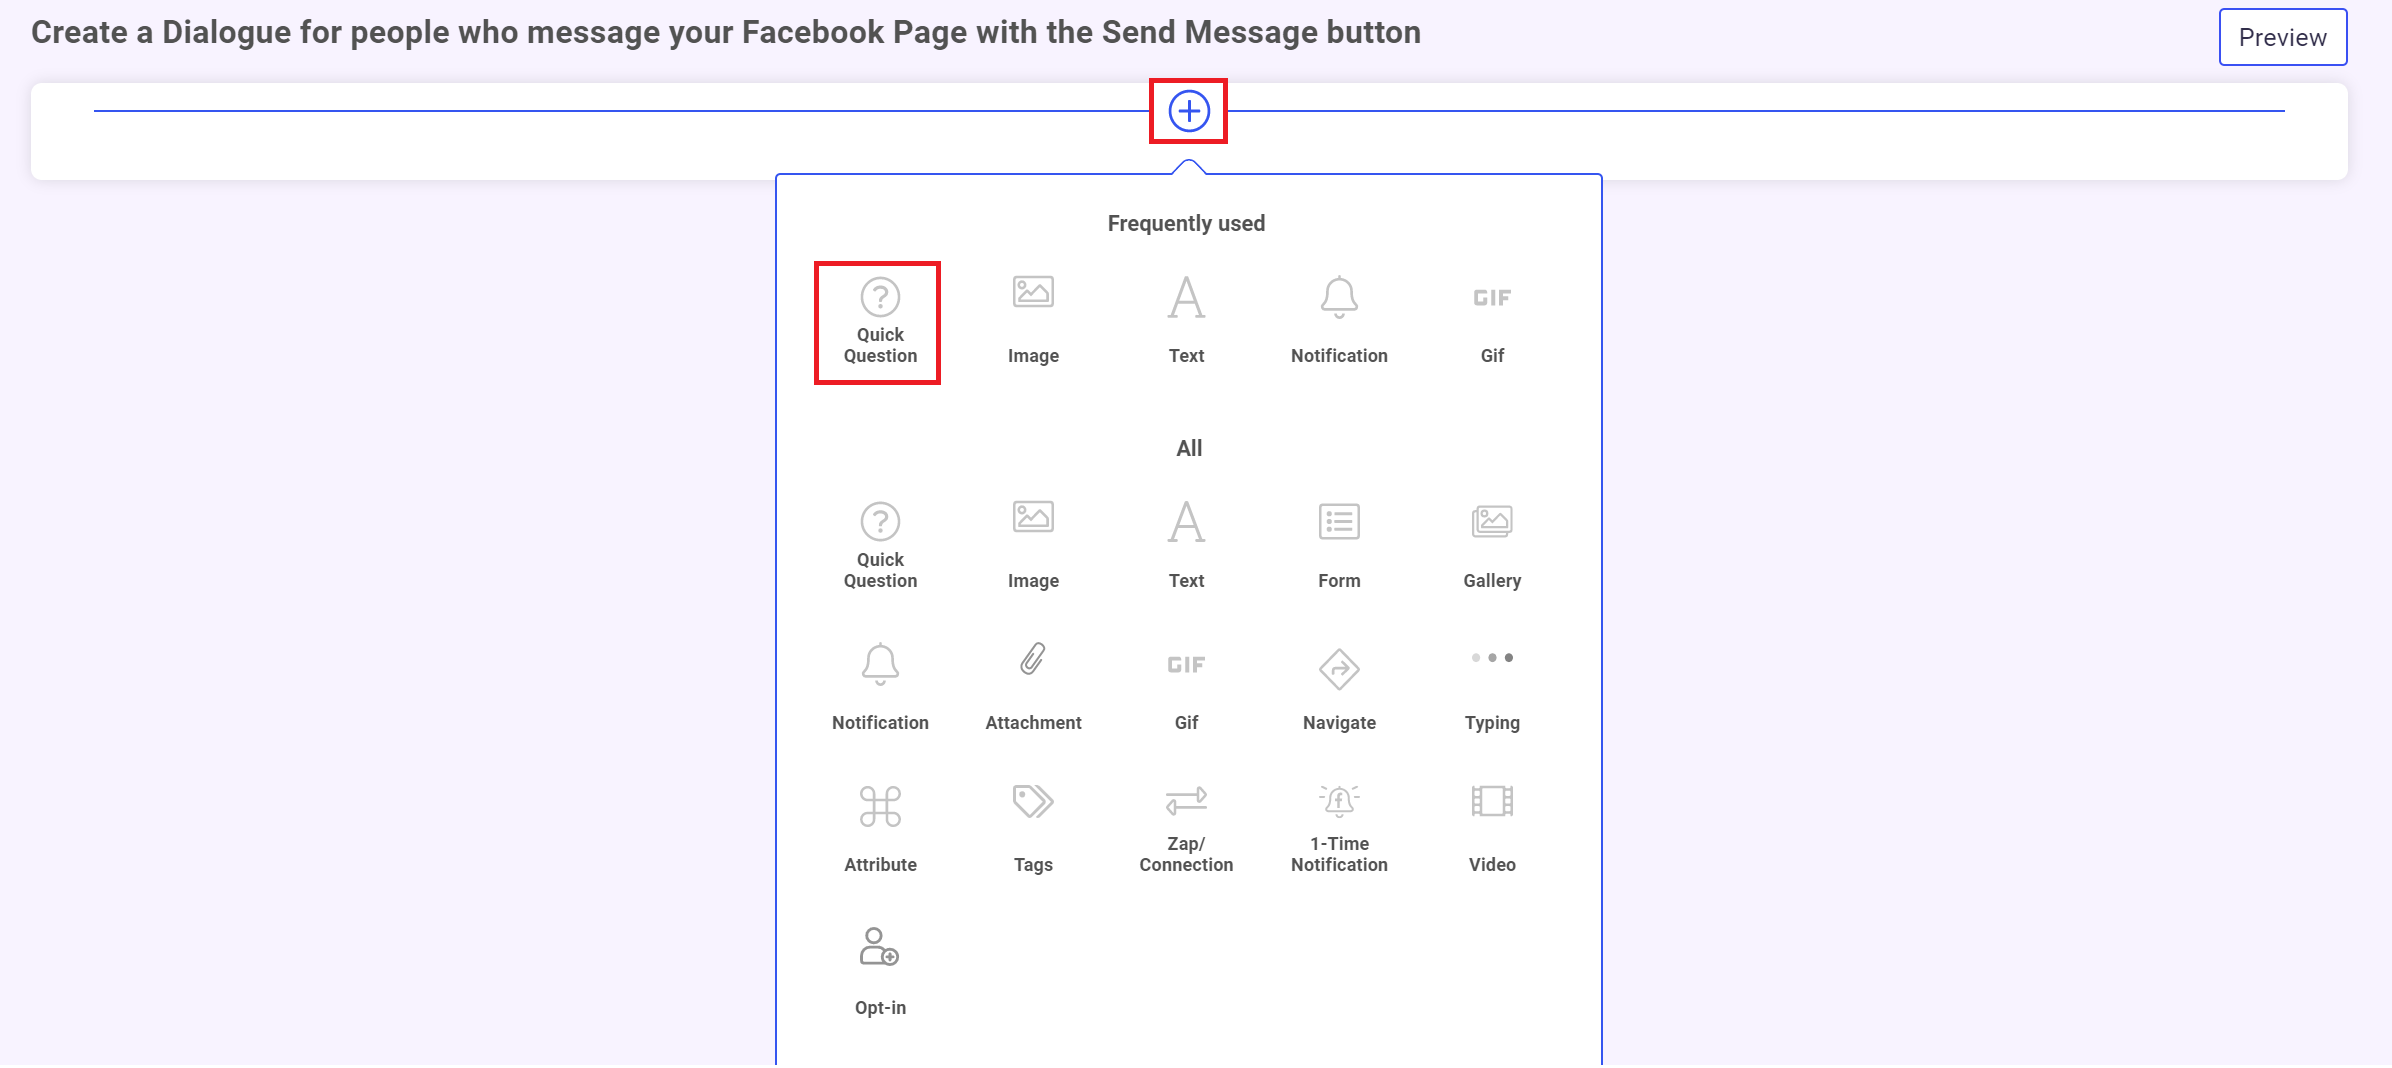
The Quick Question widget allows you to provide a quick menu as you can see below.
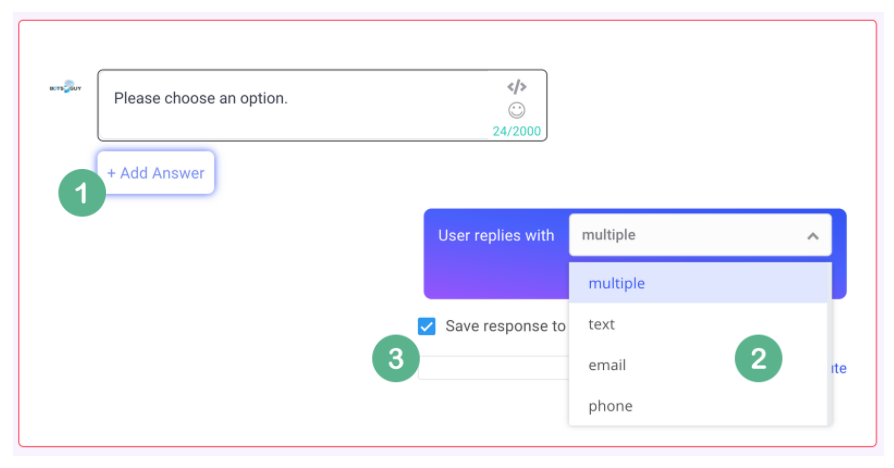
- This is the options that will show up for your user to choose from. We recommend only adding 5 at the most.
- There are four different actions you can choose for your Quick Question widget.
- Multiple Choice
- Text Only
- Phone
- You can also choose if you want to save the data to a custom field. This is a good idea if you want to build custom audiences that can be later used to retarget your visitors.
For this example we are going to use the Multiple Choice option.
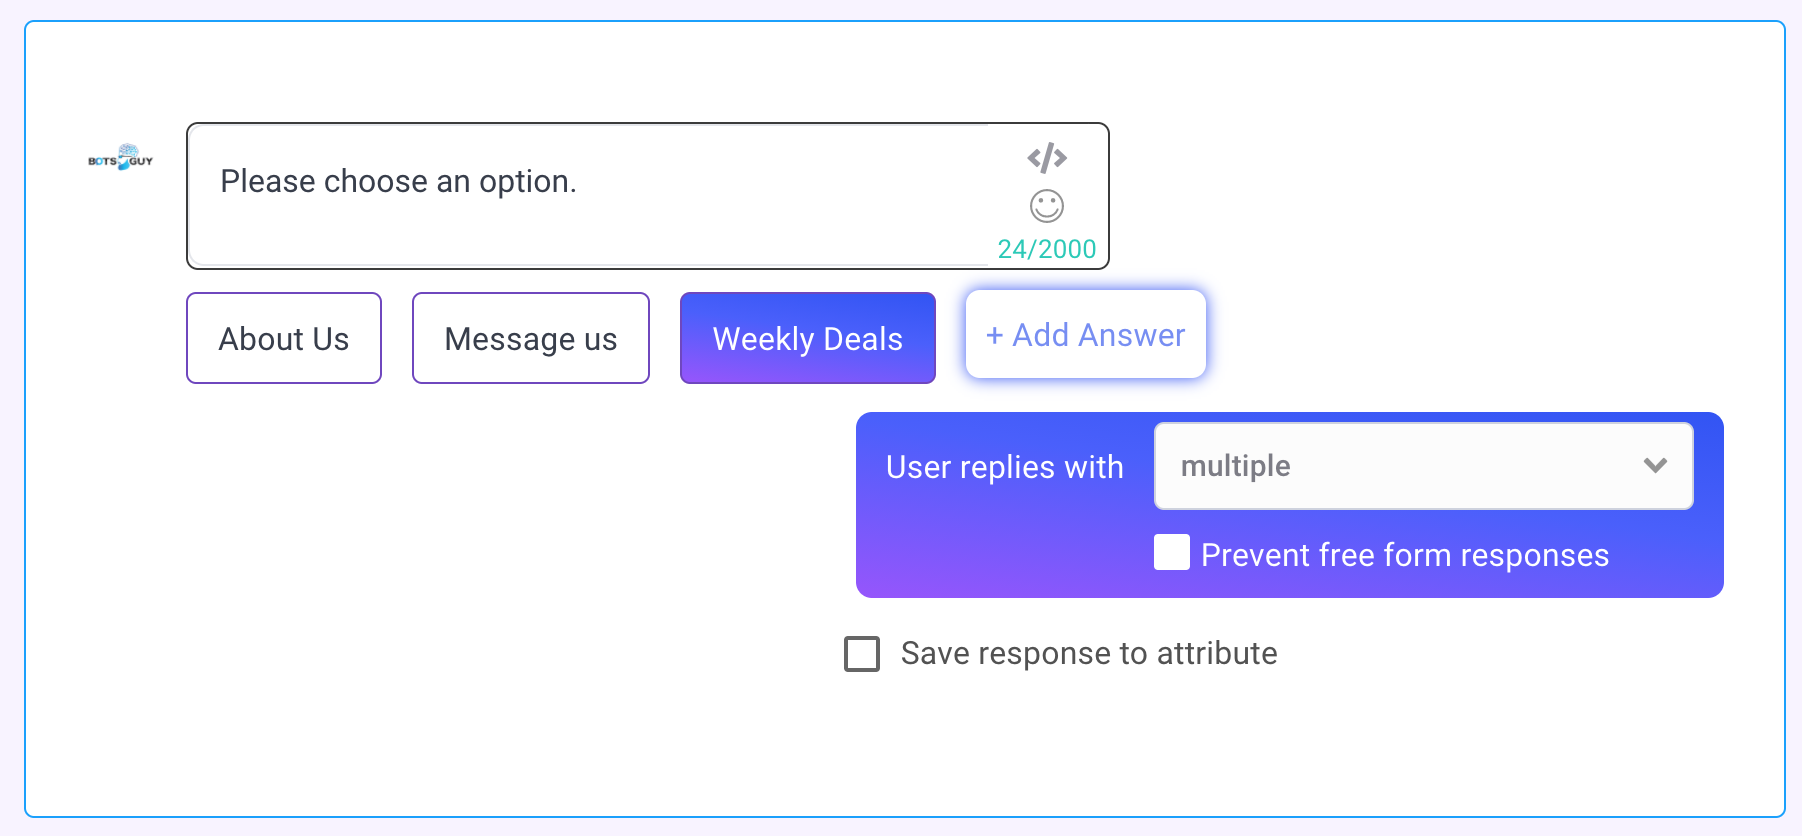
You can add multiple buttons and each button will have it's own conversation. Once you add a button you will have two options.
- New Dialogue - This is where you will create your new conversation.
- No - If you just want to give them an option that takes them to the next widget you can choose this.
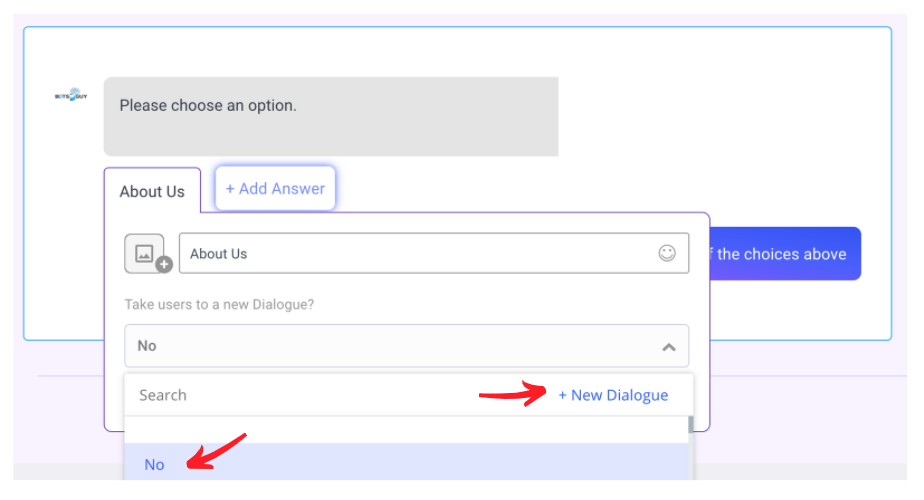
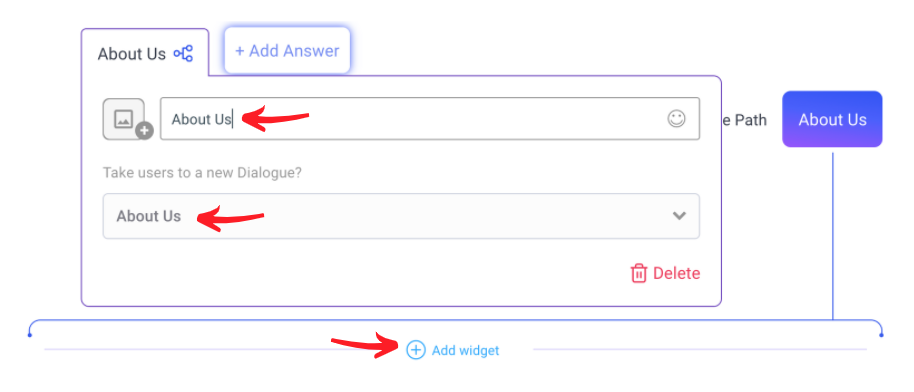
Let's choose the "New Dialogue" MobileMonkey will use the same name that you named the button but you can always rename if if you want.
You will see a drop down underneath "Take users to a new Dialogue?" This will show you all the existing dialogues you have created so you can easily link a button to them if you want.
To start adding widgets to your new dialogue click on the "Add widget" link.
Continuing with our About Us example. We are going to choose a text widget. Inside the text widget you can type the information about you and or your company. Now remember, most people will be accessing this from their mobile phone so you don't want to put too much text.
TIP: If you have a lot of text add multiple Quick Question widgets with the text option. Then add one button that says "Continue". This will give the user time to read before the go to the next block of text.
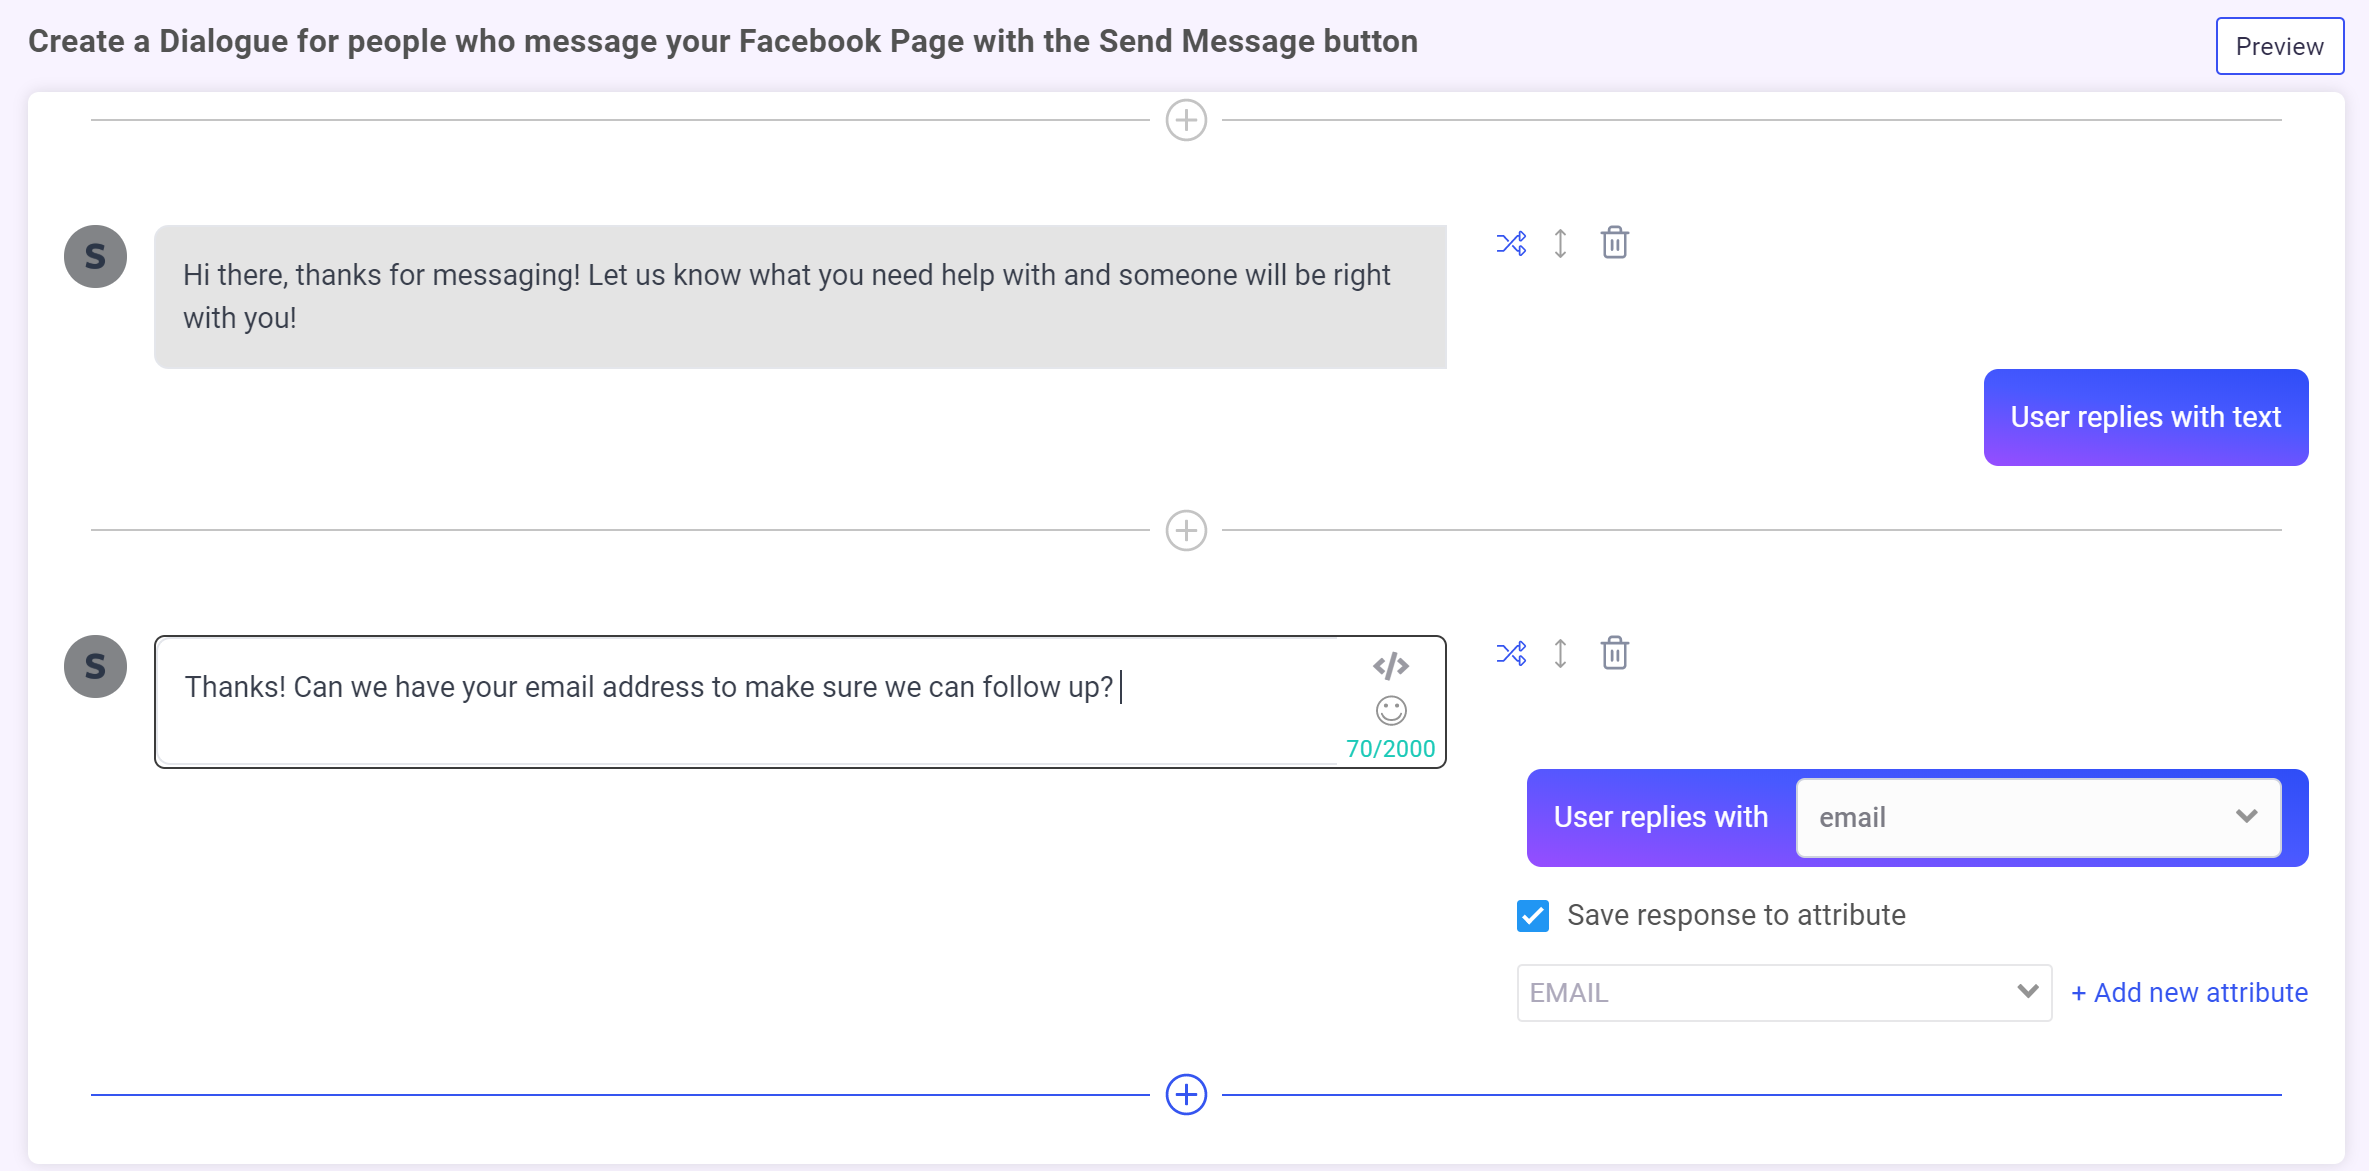
Ask the user for their email address
Next up, add another quick question. This one should have the User Reply set to email, and should ask them for their email address.
Great job!
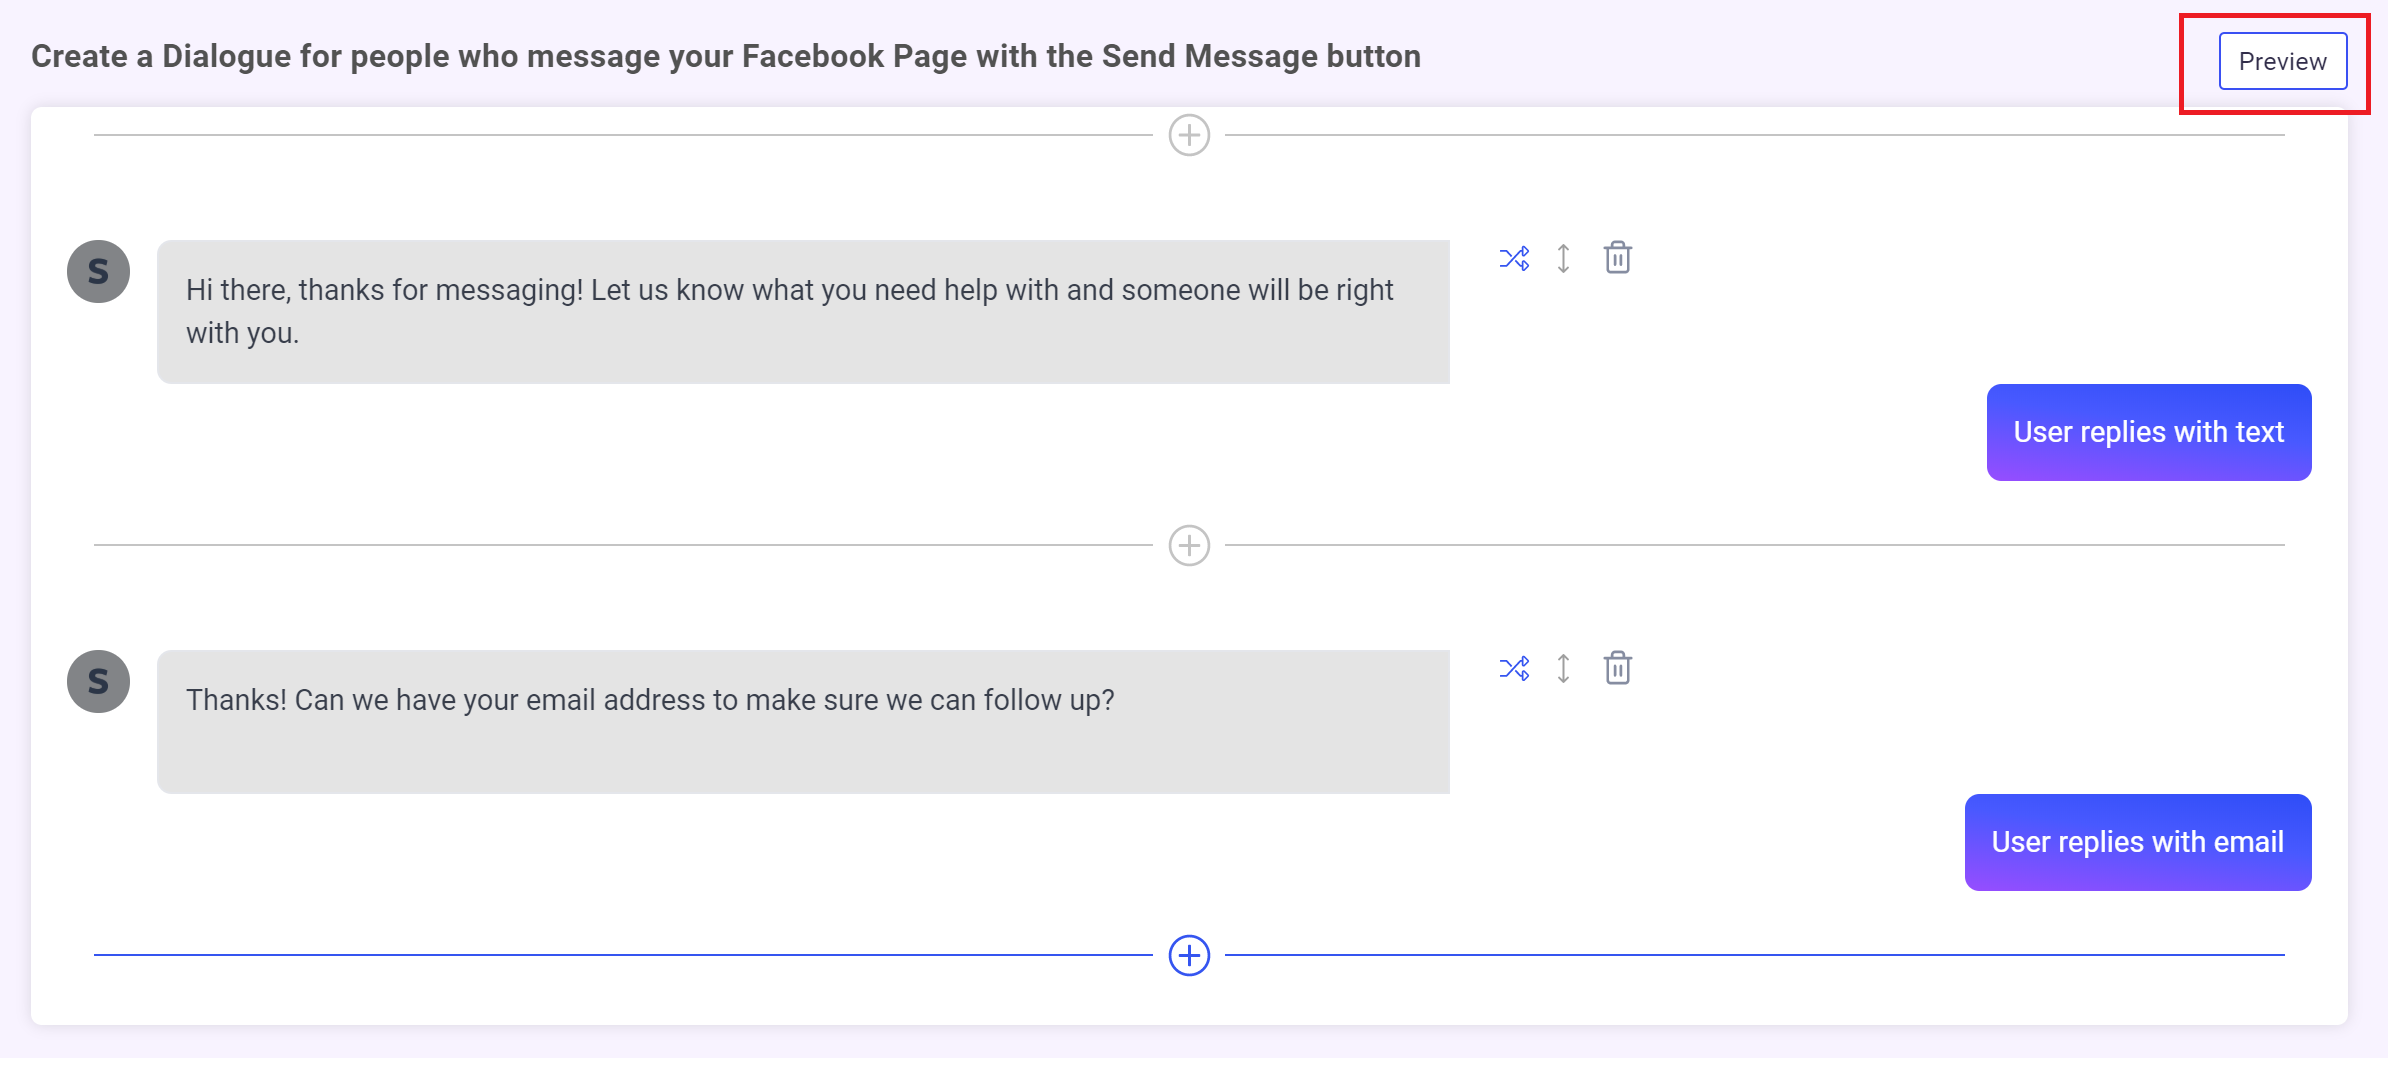
Step 3: Preview your newly created Chat Starter
It's time for the payoff! Click the Preview button at the top of the screen, and check out your new experience in Messenger.
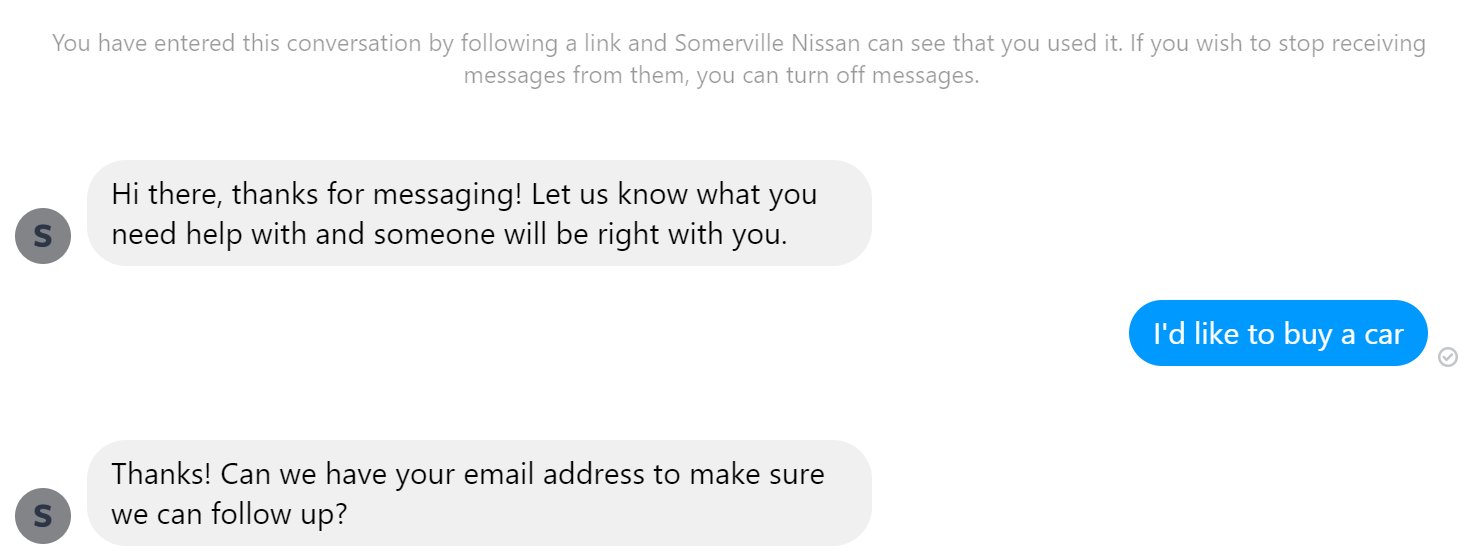
Here's what it should look like
If you have issues here, contact support@mobilemonkey.com.
Move on to Part 2!
Great job! Now that you've configured your first Chat Starter. Let's learn how to use it to segment your audience in Part 2!