Zapier Connection Widget
Video Overview
If you want to capture data and then send it to an external location like a Google spreadsheet or another CRM then you need to set up a connection with Zapier. MobileMonkey makes it easy to do this. All you have to do is create a Zapier trigger and then you can place this widget after any dialogue and whatever data has been entered by a user can then be sent to Zapier and then sent to the external system.

- Add this widget after any widget or series of widgets in the dialogue to capture data
- Send data to a spreadsheet or your CRM
- Integrates with Zapier
Let's see how to do that.
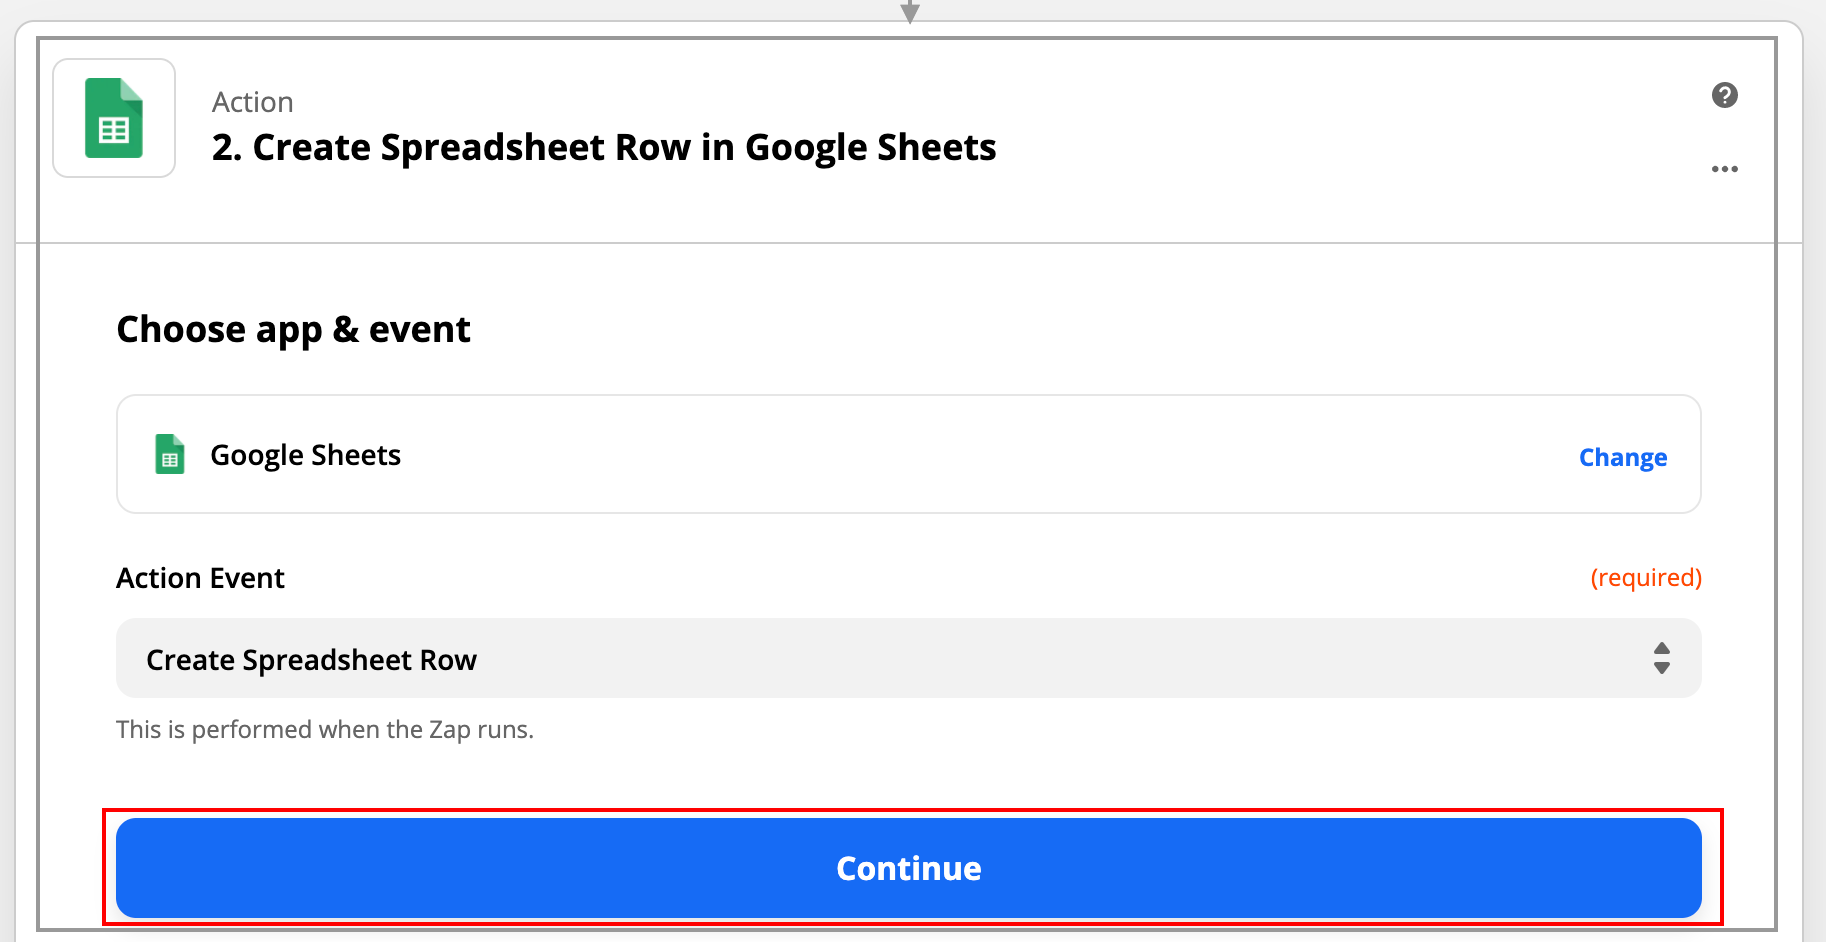
- First thing you want to do is click on Integrations on the top of the MobileMonkey dashboard.
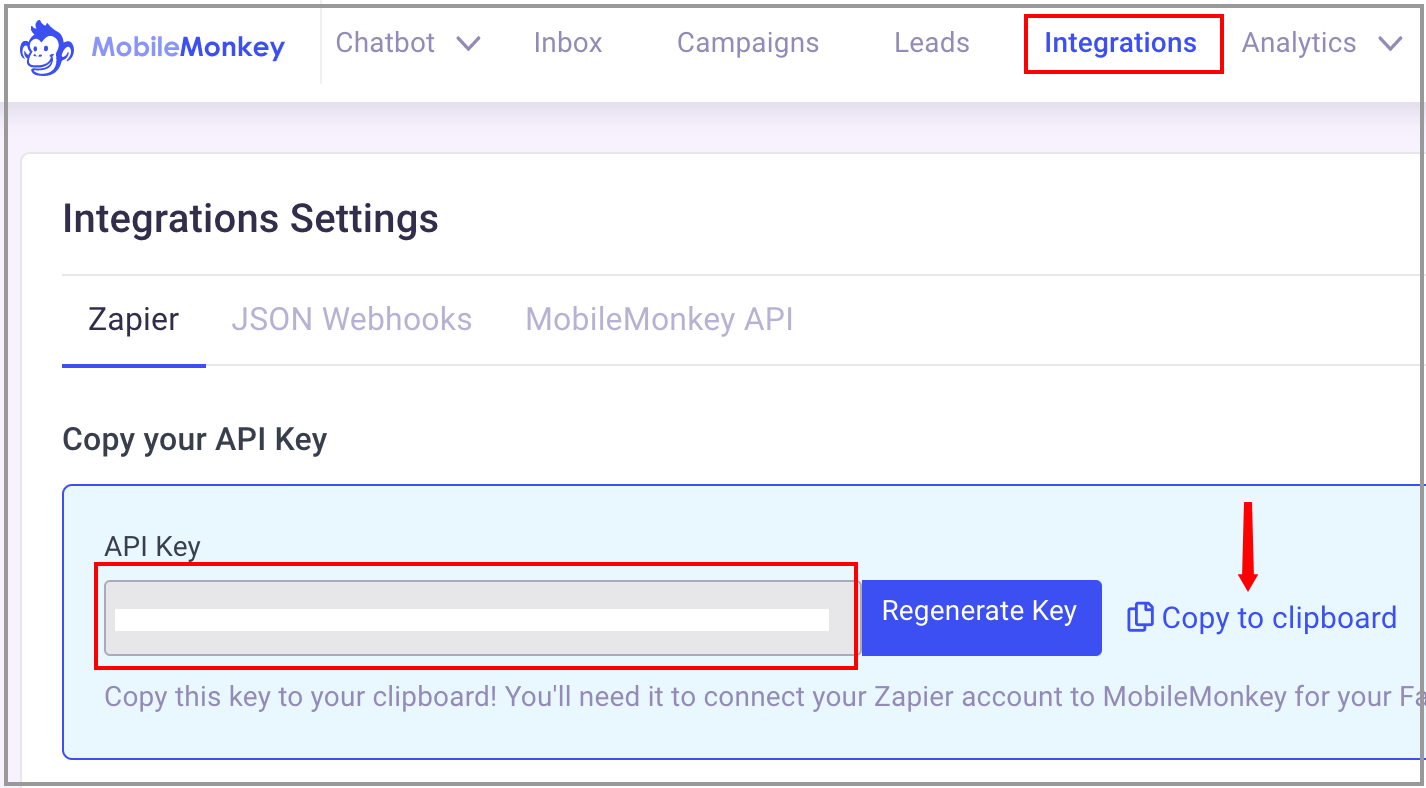
From there you are going to see an API Key. If you don't see a number in the box you can click "Regenerate Key". Click on the "Copy to clipboard" and then scroll down. You will see a list of pre-done zaps. Since we want to send data to a spreadsheet we want to choose the one at the bottom.
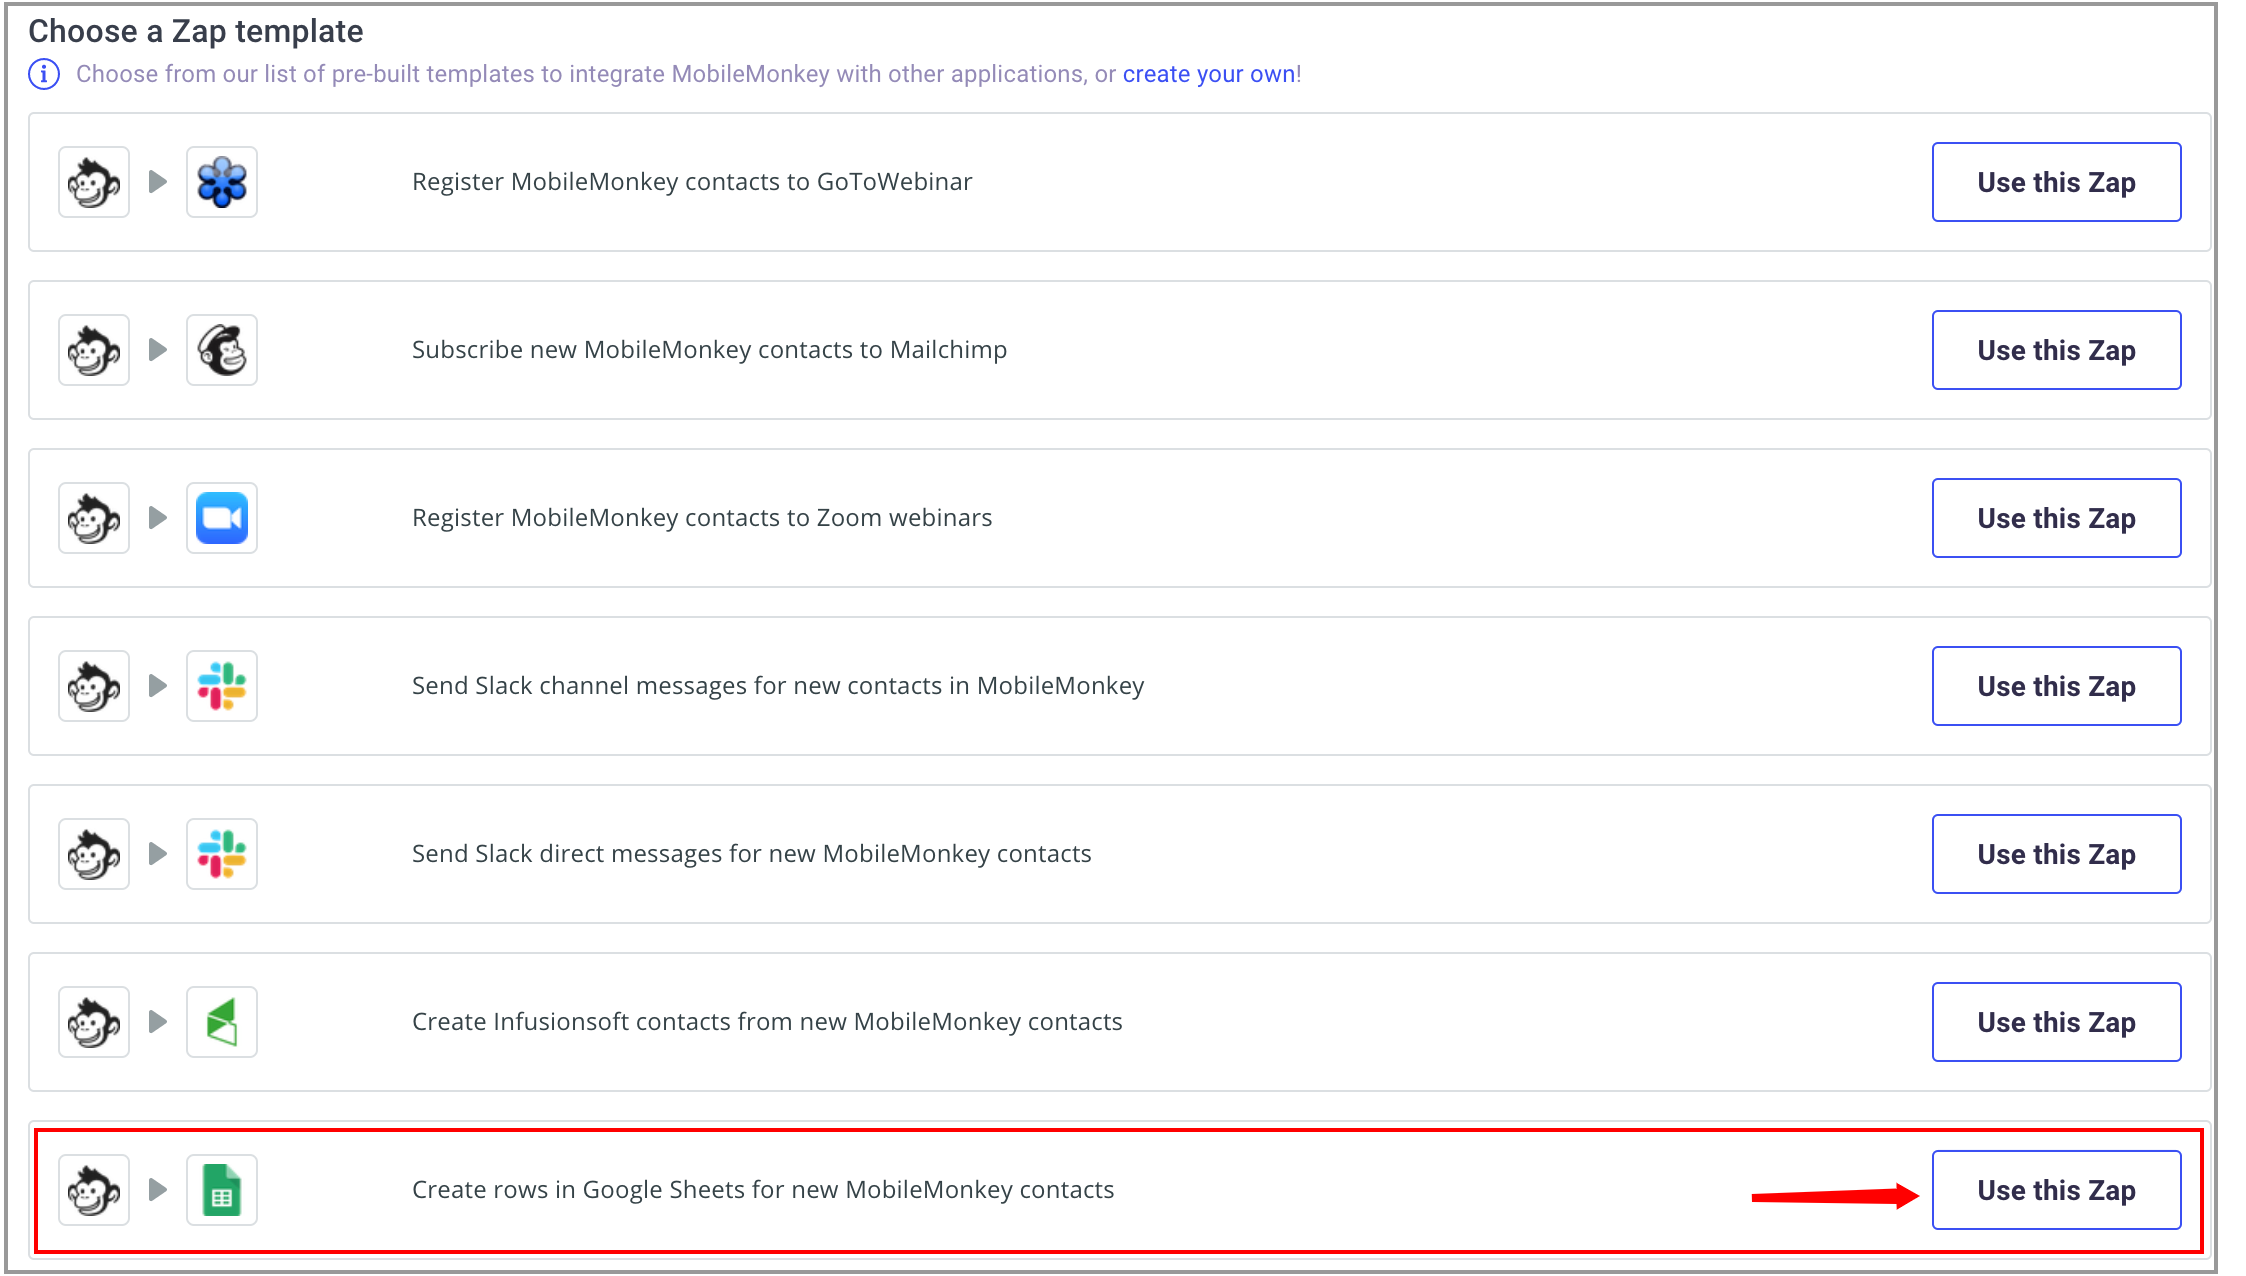
Click on "Use this Zap" and that will open up a new window. If you don't already have an account or you are not logged in you can do that first.
Once logged in you will see the next screen.
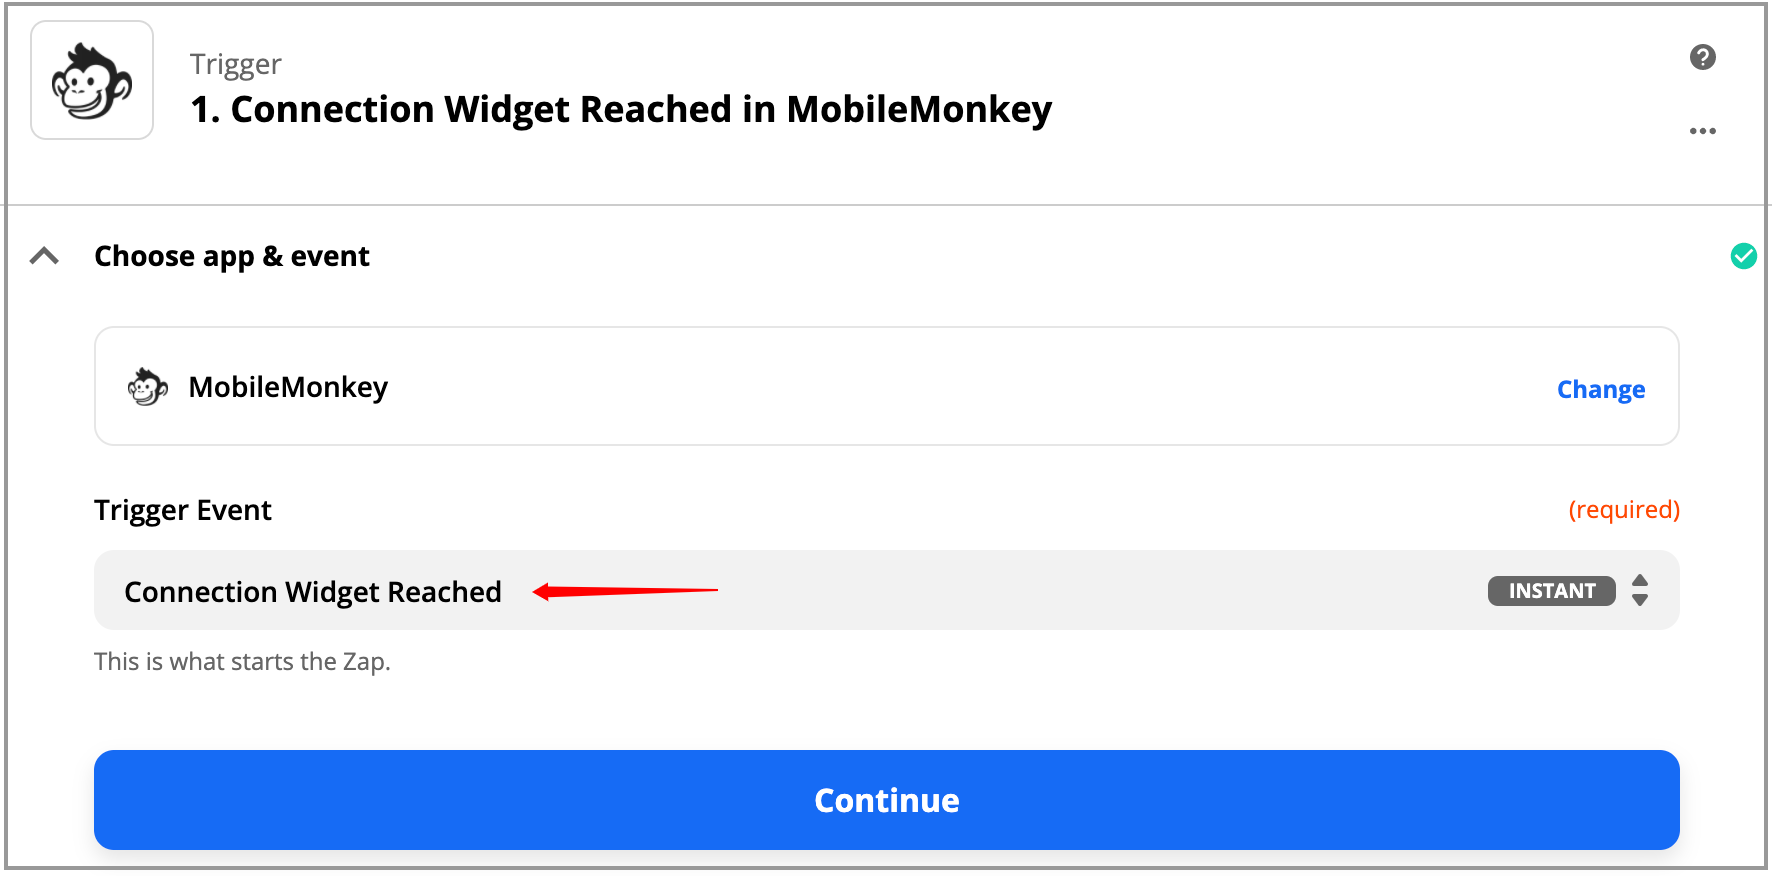
You want to make sure and choose the Trigger Event of "Connection Widget Reached". This will make sense later on in the document when we add the "Zapier Widget" to the MobileMonkey dialogue.
After you hit continue it's going to ask you to name the trigger. This is important because this is how MobileMonkey knows which Zap to run.
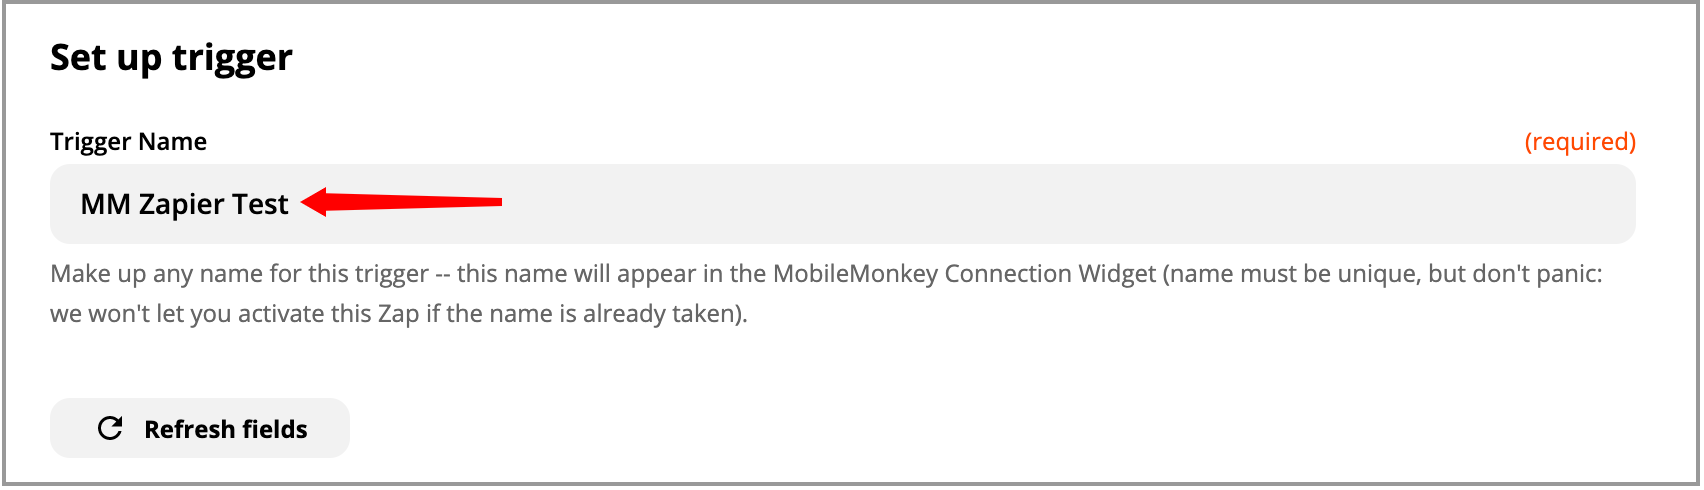
We have named ours "MM Zapier Test". You will see why that is important later on in this helpdoc.
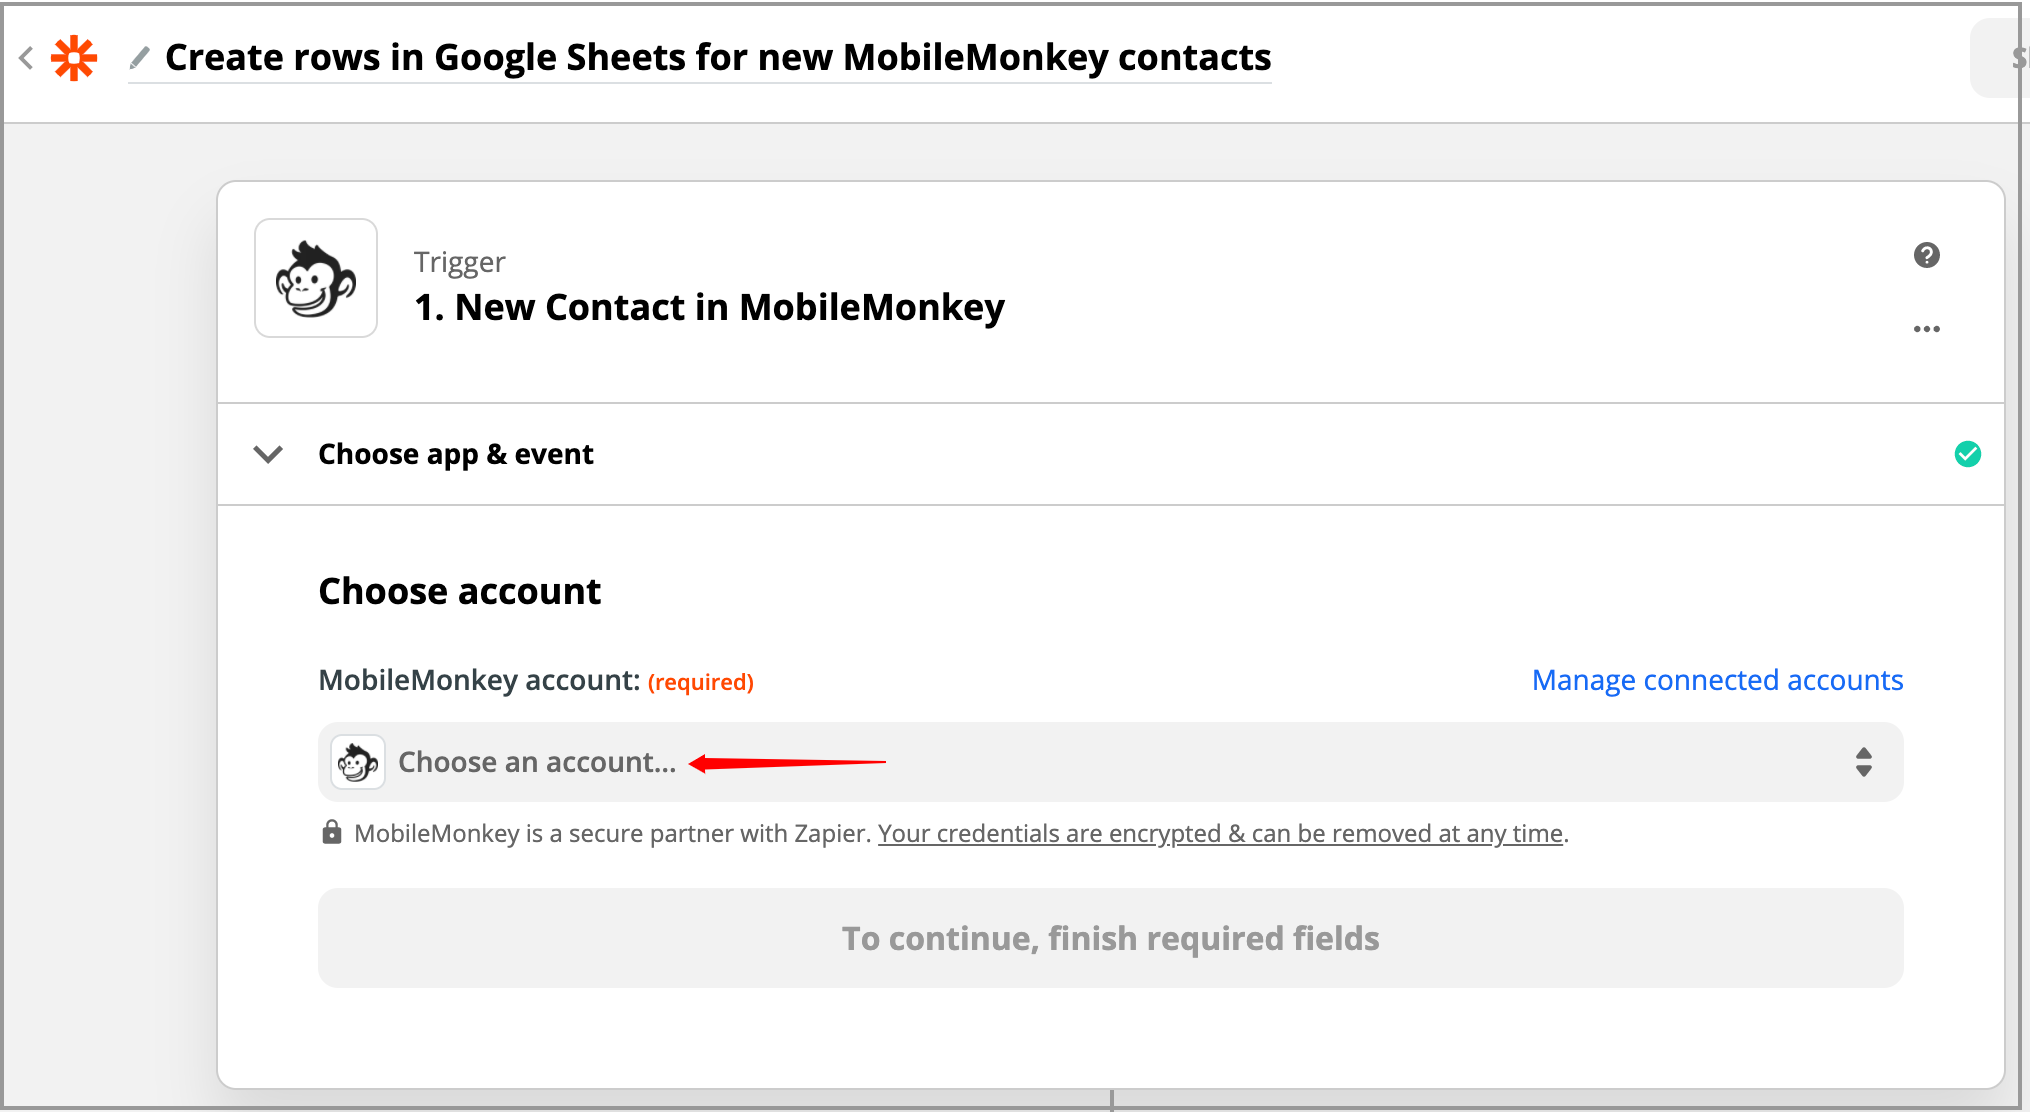
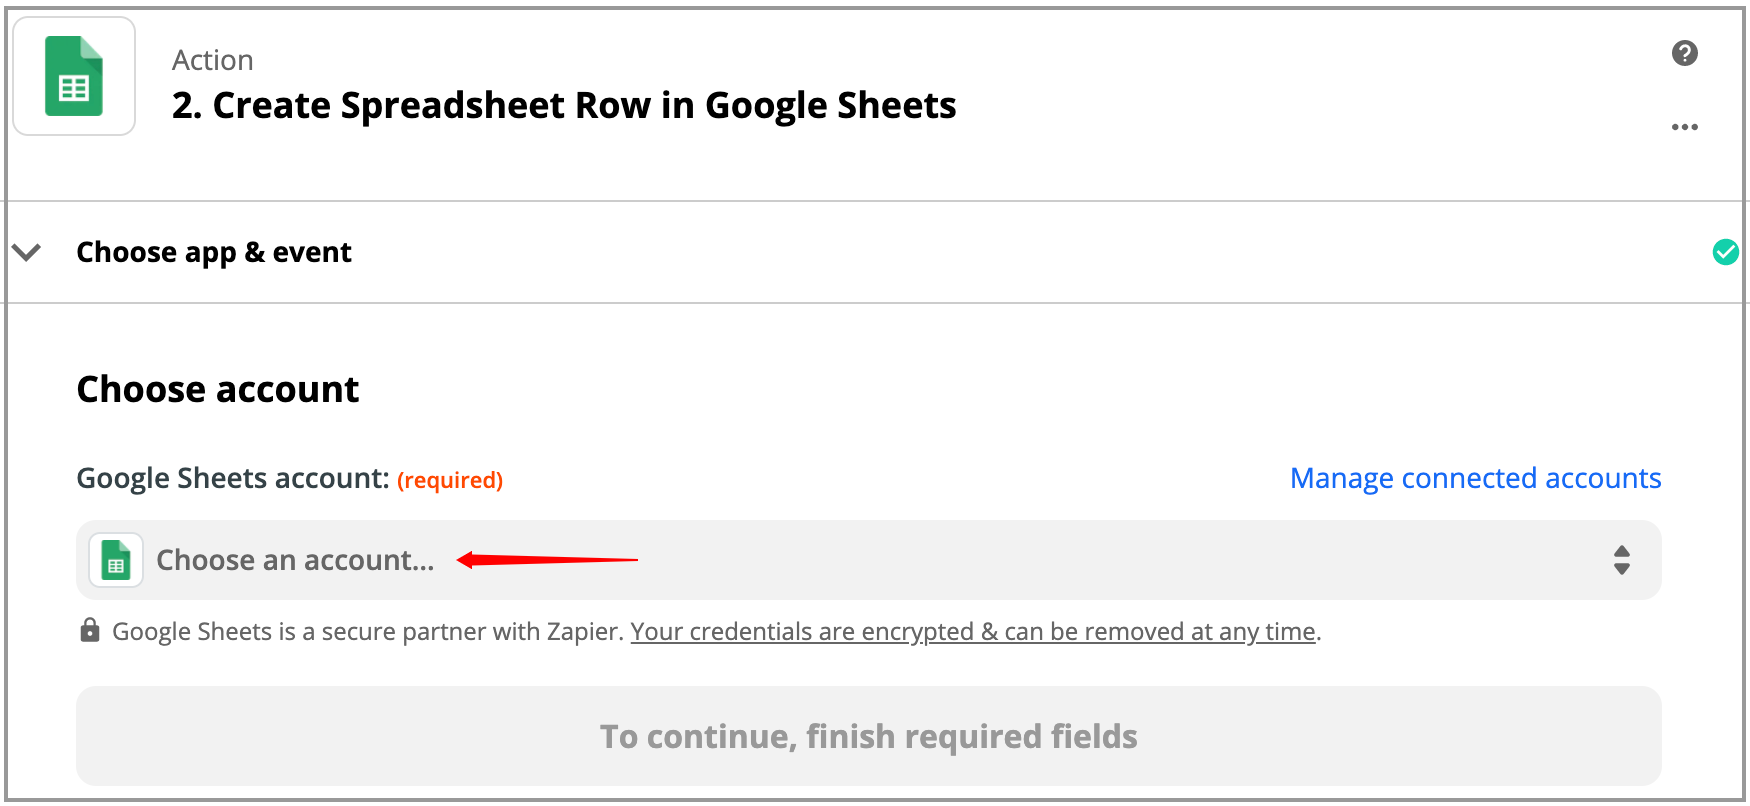
Now click on the choose account. This is where you will use the API key that you copied earlier.
Choose New Account if you have not connected to this MobileMonkey bot before.
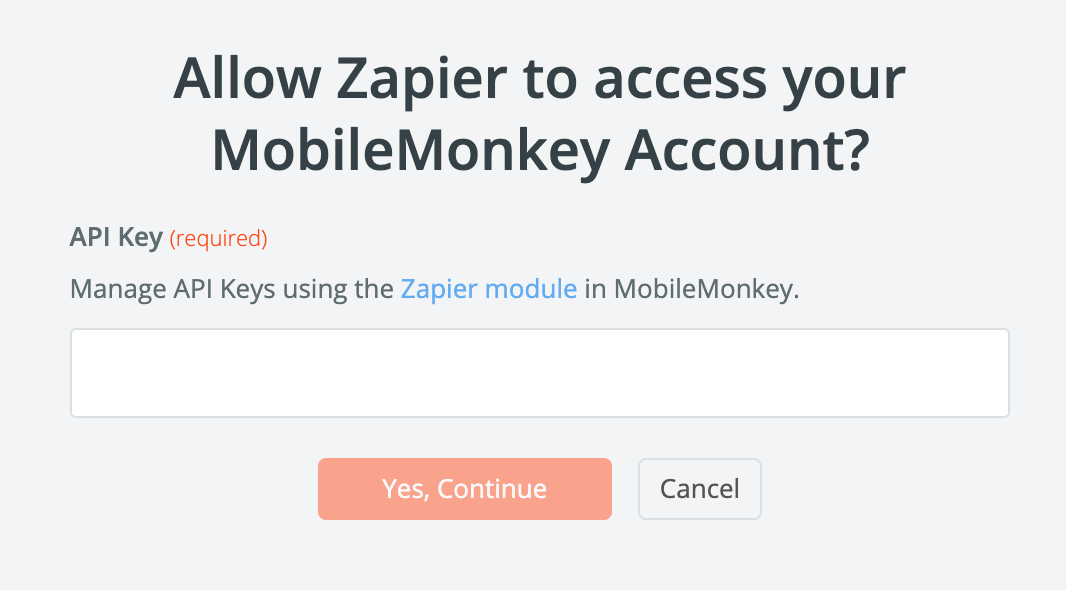
Now paste the API key and click "Yes, Continue".
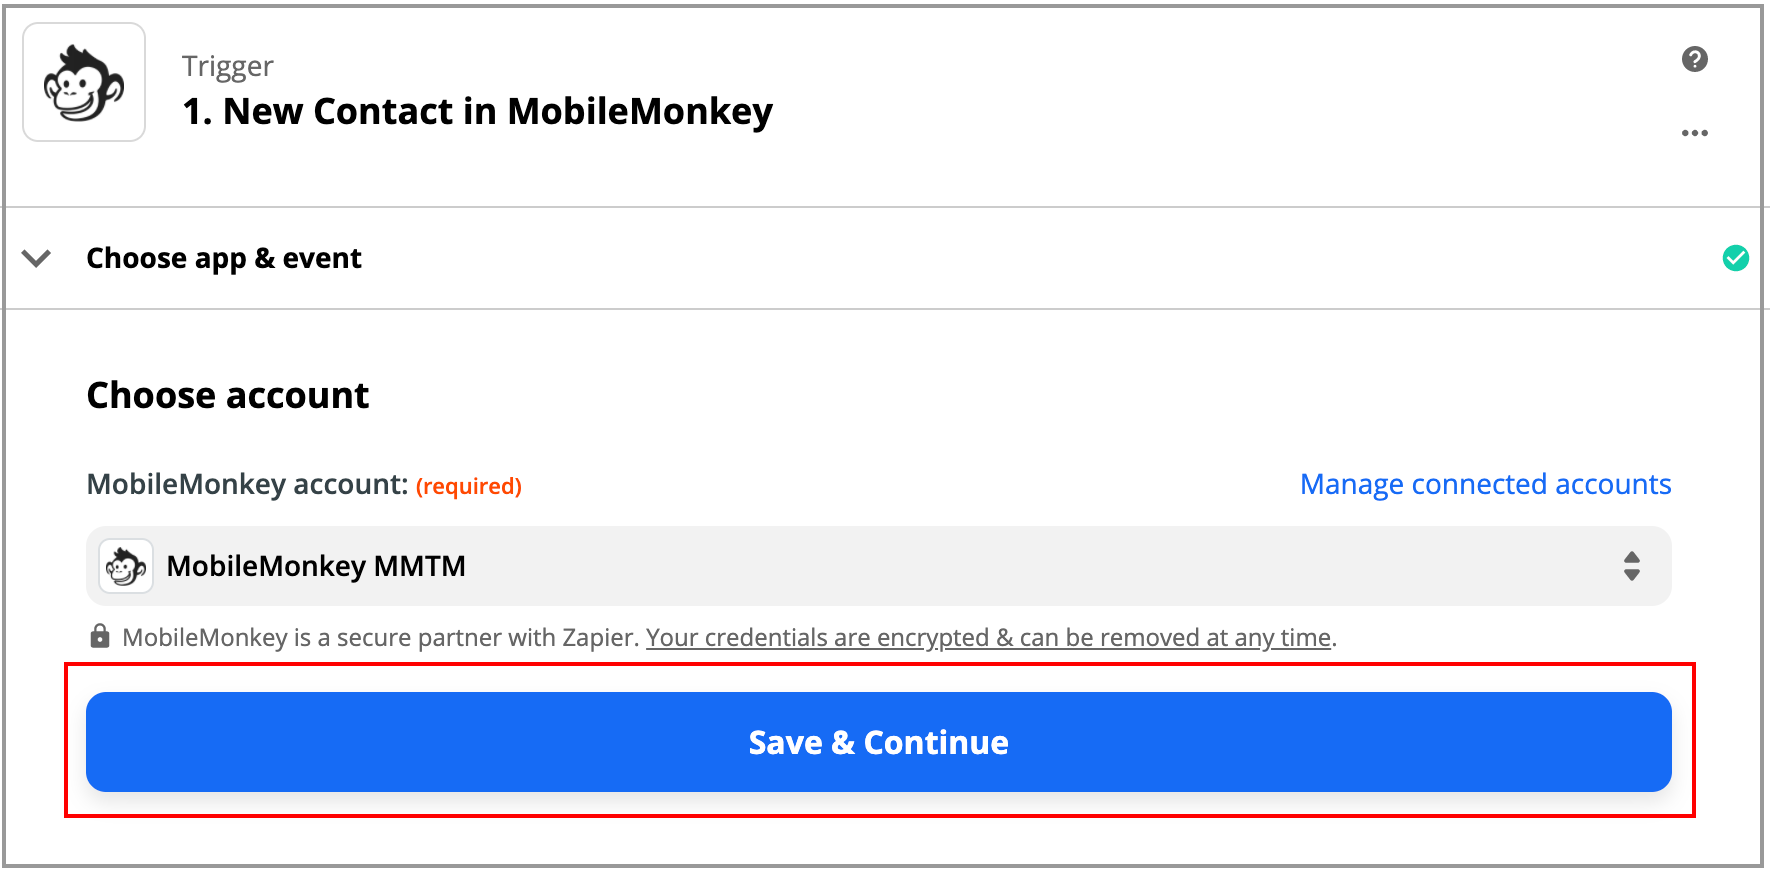
Now click "Save & Continue"
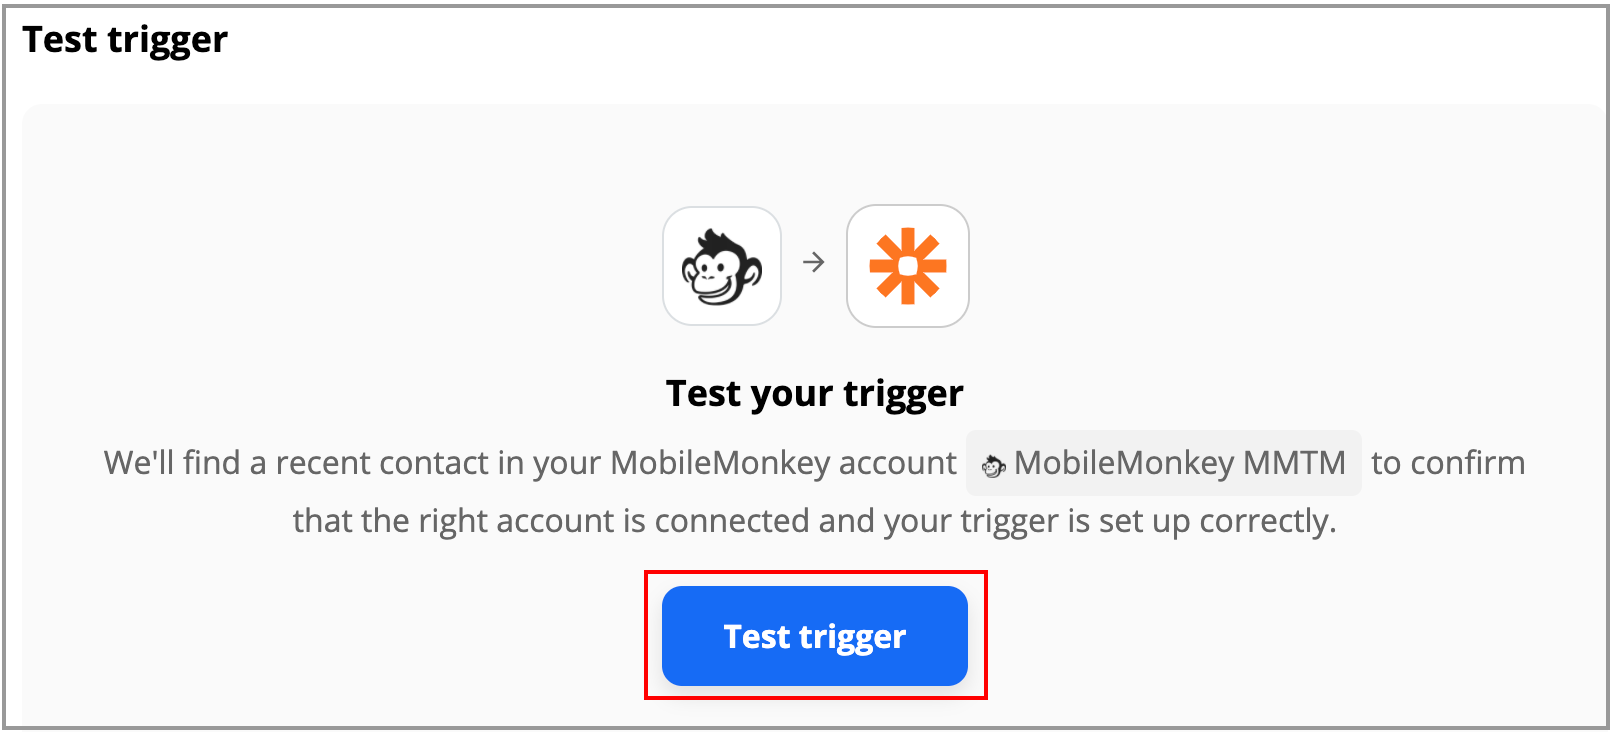
When you click "Test trigger" you should get some data from having gone through your bot.

If you don't get any data them go back to your bot where the Zapier widget is and do a test then come back to Zapier and test the trigger again.
Now we will connect your Google sheet.

- Next step is connecting to your Google Sheet.
Now click continue and it will ask you to sign into your Google Account.
If you have not already connected to your account before then click the "Create New" and it will ask you to sign into . your Google account to give permissions.
Once you are signed in to your account you will be able to choose the spreadsheet that you have created and the worksheet which is most likely the default one.
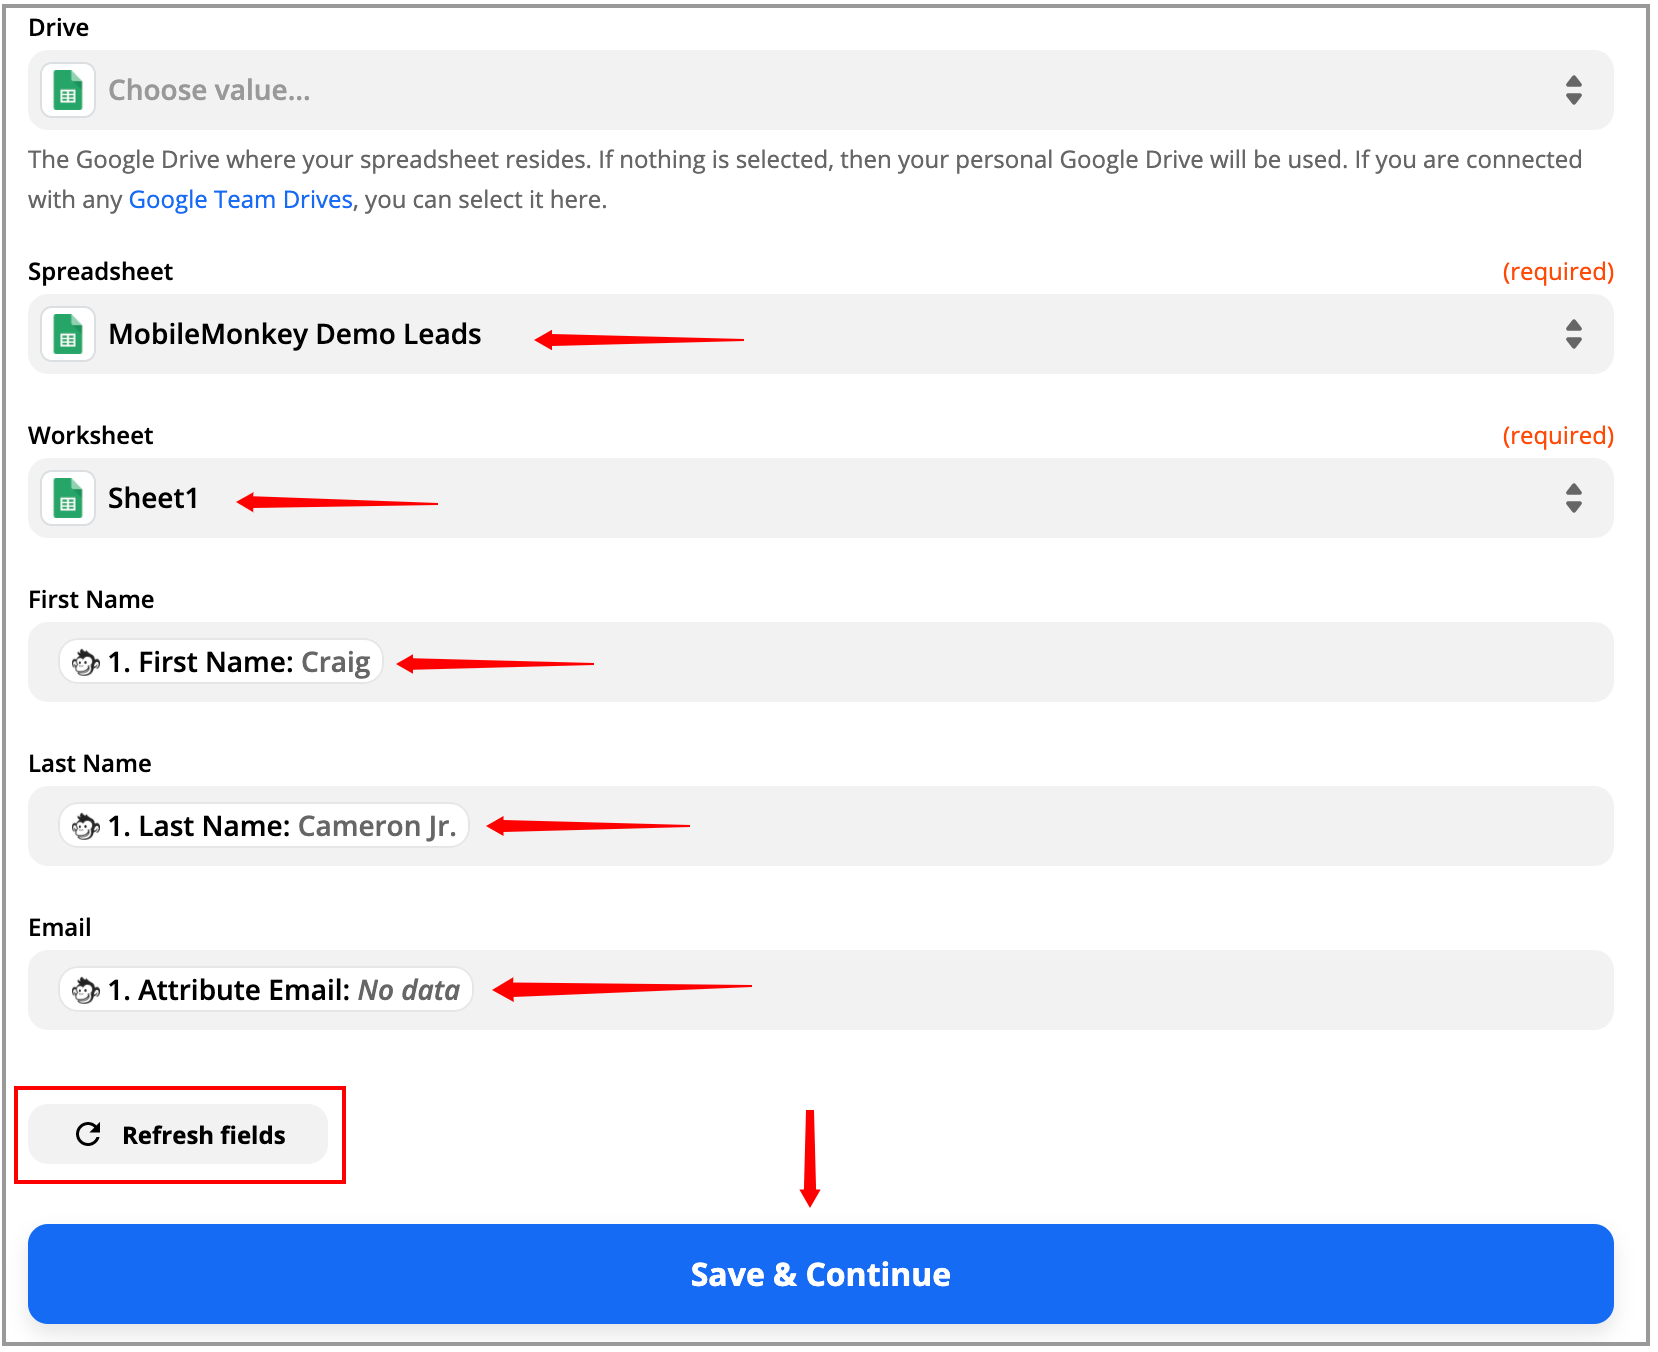
You will notice I didn't choose "Drive". You would only choose that if your document was in a different Google drive.
You will see that I have chosen my spreadsheet, worksheet and the values from the test data. You will see that the Email value has no data. That's because when I did a test I didn't enter my email. As long as the field is there you will be fine.
Now hit Save & Continue.
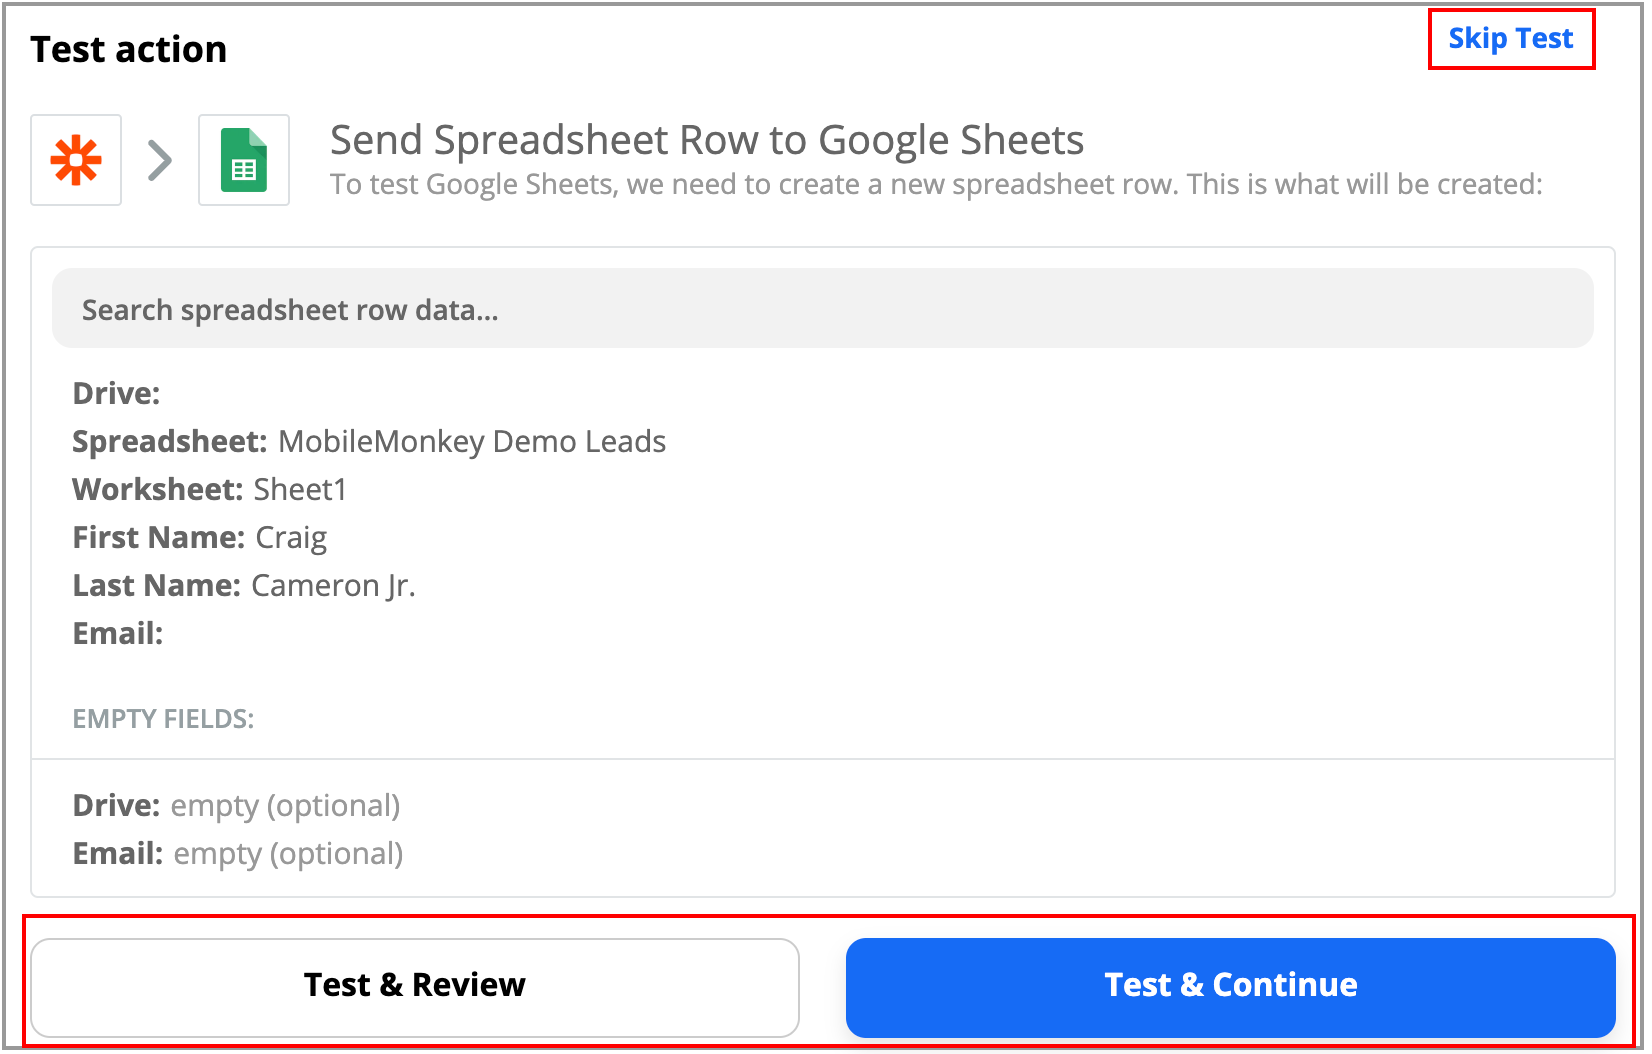
You have three options here.
- Test & Review which will let you see the data sent over.
- Test & Continue which will just send the data and continue to the next step.
- Skip Test which will just go to the next step and assumes you feel you have set up everything correctly.
I usually to test & continue.
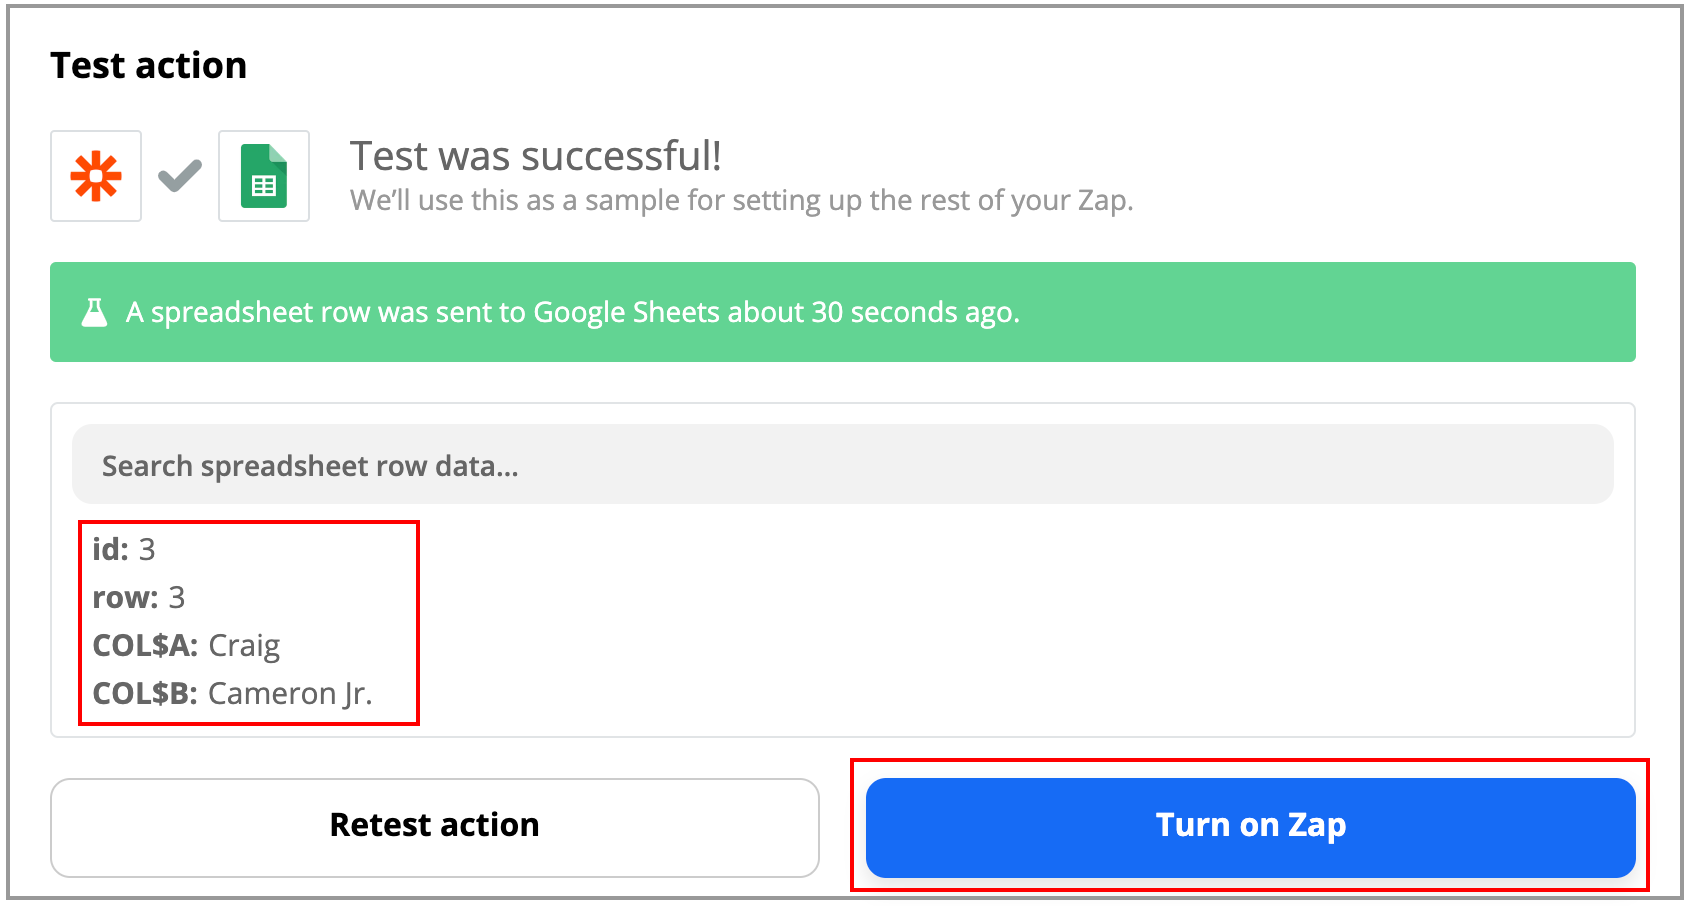
As you can see the test sent my name over to my spreadsheet but did not send an email. That is because I did not have an email in the test data. Since we have specified the email in the field the next time we go through the bot and verify our email then Zapier will recognize it and pass the data on.
Now just turn on the Zap and head back to MobileMonkey.
Now find the dialogue that you are collecting data. This will most likely be a quick question widget set to email, or some other attribute. It can be as many widgets of data as you want as long as the widget is after the data being collected.
Now add the Zapier Widget as I have done here.
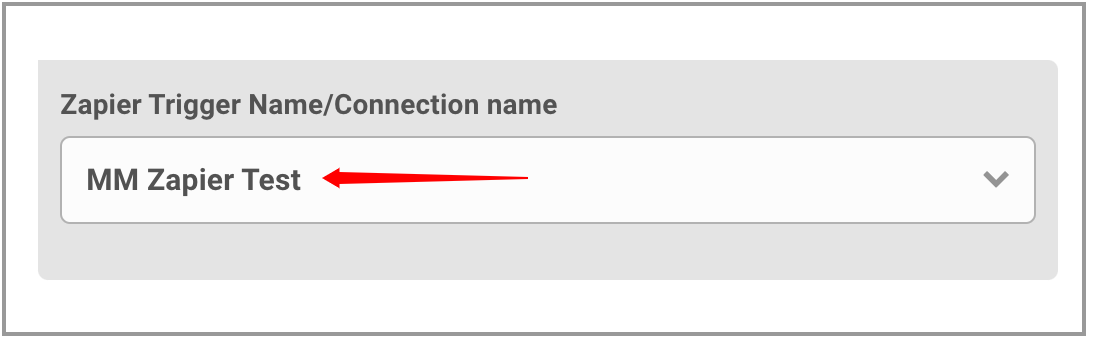
You will see that the name we put into Zapier shows up here. If you don't choose the right name then it won't work. Also you may not see the name show up the first time and if that happens just refresh the page.